It’s time for the Monthly DIY Challenge! This month we got to work with a material that most of us had never used before, air dry clay, and man did it test us!

I was thisclose to making this a “How to not DIY your own faux coral” post, but I do think it can totally work, just with a few tweaks that I’ll talk about.
I STRONGLY encourage any of you coastal style decorators to find (or make) faux coral to use in your displays rather than real specimens. You can rarely tell the difference and it helps discourage the horrible collection trade of coral from coral reefs.
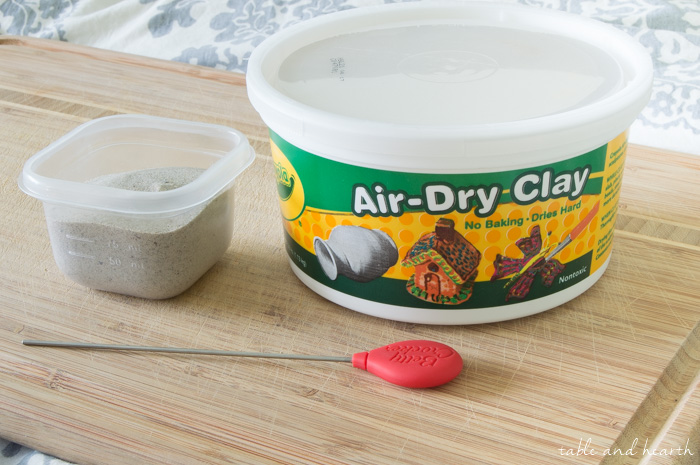

Supplies for DIY Faux Coral
- air dry clay (I used Crayola’s)
- toothpicks
- cake tester (or similar poking/smoothing device)
- sand (optional)
- spraypaint (optional)
First up, I formed the base of my coral. This air dry clay is much more like true CLAY clay than I thought it would be. I used toothpicks to support the arms as needed since the clay is pretty dense and heavy.

Now, this is where I will suggest that you do this differently than I did. After making my base, I continued attaching all the arms and towards the end, they ALL started sagging and falling (insert shocked emoji here). I tried to fix it as much as I could, propping them up on things for the drying time, but in doing so alot of what I had done got sacrificed :/
So, I suggest making the base and inserting however many toothpicks you think you’ll need for arms into it, then letting that dry on it’s own (dry time is about 24 hours). THEN proceed with putting the arms on. I think this will allow the base to be much stronger and not cave with the weight of the arms.

To make the arms, just roll some of the clay with your hands, making it slightly smaller at one end. Stick a few toothpicks in it to help hold it, I guess you could even use small dowels too.
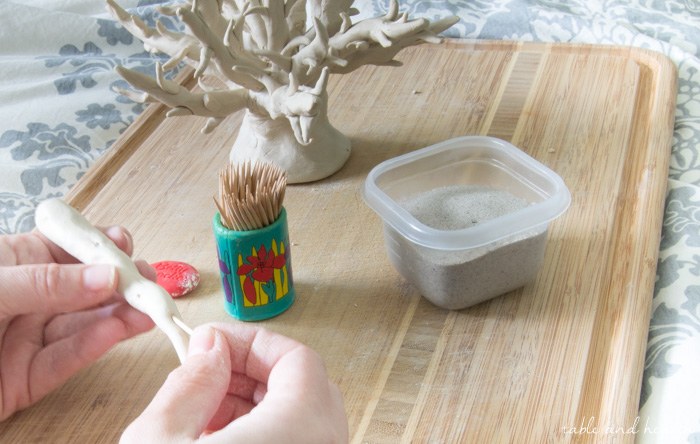
I wanted my coral to be spiky so I rolled some little pieces into a comma shape, then stuck and smoothed them carefully onto the branches.

I used my super high-tech clay working device to make the coral’s “polyps” all over, as well as try to smooth out any places I could. After that, I sprinkled some fine beach sand over it to give it a little more texture.

The air dry clay takes about a day or so to fully dry, so I just made sure it was in a safe place (and all propped up) while it dried. I really thought about spraypainting this piece but liked the matte look of it and it dried lighter than I thought it would so it worked out. But if you want a crisp white or even a fun, bold color you can spraypaint it once it’s all dry.


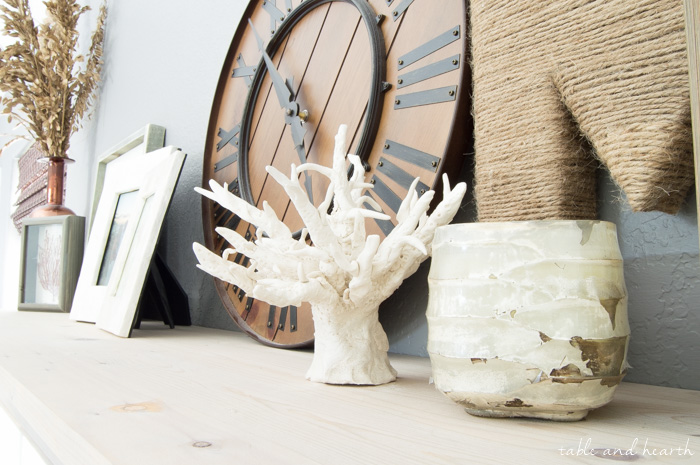
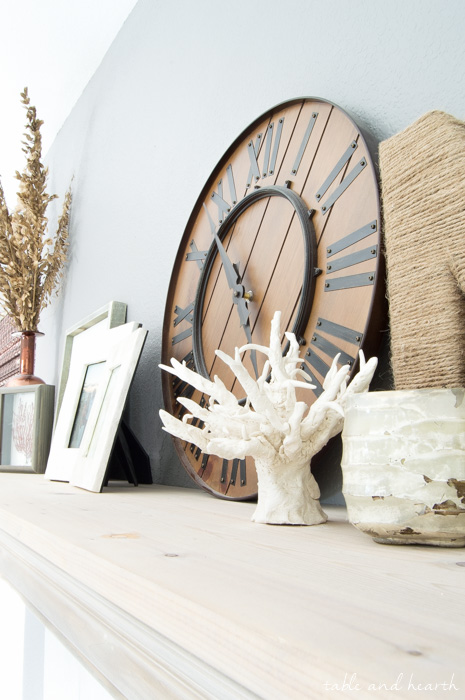
Even though my first try at air dry clay coral had some hiccups, I think this is an awesome way to get the look of coral without having to buy and condone the selling of real pieces. Plus, you can make it whatever size you want for where you want to put it!
Now, hop around and see what the other girls created with their air dry clay!!


Such a great idea to DIY your own coral. I love the texture you gave it and think it turned out really pretty!
Thanks Amy, just don’t look too close! :)
Wow – this is like an actual sculpture! Great work on this; so awesome that you could make faux coral out of clay instead of spending $$$ for the real thing!
A beginning art student’s sculpture maybe! I definitely plan to practice with this stuff and figure out how to make it even better :)
I love the idea of making your own coral decor instead of using real coral! I never would have thought to add sand to it- great idea!
I think the sand would look really great if it were spraypainted because you’d definitely see the texture then. Something to try on the next one!
I love that you are always practicing what you preach. So true about not needing to bring or buy real coral… leave it in the ocean and make your own out of clay! :)
That is just the LAST thing we need to be doing to our oceans…so any little bit of change can help <3
I. Love. This. Your coral looks so realistic!! And I love that it is also saving coral from being poached from the ocean. You should sell these in your shop!
Ha! I’ll see if I can hone them a little more, although the thought of shipping these makes me shudder…I’m scared to even move mine :) But thank you Erica!
You are seriously a pro at all things coral! It turned out great and what a perfect idea to add sand for texture. I never would have thought of that.
I am a coral-o-phile, even moreso when I can make it myself :) Thanks Katie!
This is really cool! Great job!
Thanks so much Samantha!!
This looks totally real! I like that you didn’t paint it too, I think it adds to the effect. Awesome job!
Thanks so much Bre!!
Emily,
It looks great!
Did you use a photo for a model, or make it from your imagination?
You said you used your ‘special tool’ for the polyps, so I imagine you’re familiar with coral structure.
Your project made me want to try my hand at it, too!
Thanks.
Thanks so much Ellen! I did not use a photo or anything, just went by the real ones I’ve seen, particularly the Acropora species…and yes, I studied corals for my master’s degree, so the nerd is strong! :) Good luck with yours, great thing about the clay is that you can always remodel a piece if you need to :)