While I am away for the Haven Conference and then vacation in New York, I gathered a few of my sweet blog friends to share some awesome guest posts with you guys! Show them some love and remember that you can follow along with what I’m up to on Instagram, Facebook, and Twitter :)
Your guest poster today is Kristi from making it in the mountains, sharing how to DIY yourself one of the all-time home decor staples: the boxwood wreath! You better believe I’ll be doing one or two of these myself soon!
![]()
Good morning!
I’m SO excited to be here today guest posting for Emily! In case we haven’t met yet, I’m Kristi, the gal behind Making it in the Mountains where I blog about our journey to transform our first “fixer-upper” (take the tour here).
Though we’ve been in this new (to us) home for several months now, we’ve been taking our sweet time making it our own as we work our way through the house room by room. So far we’ve tackled this Rustic Boy’s Bedroom for our not so little guy and now, though there are so many other spaces in our home in desperate need of a makeover, we’ve decided to concentrate our efforts on the porch next with the hopes of taking advantage of our short Summers here in northern Alberta.
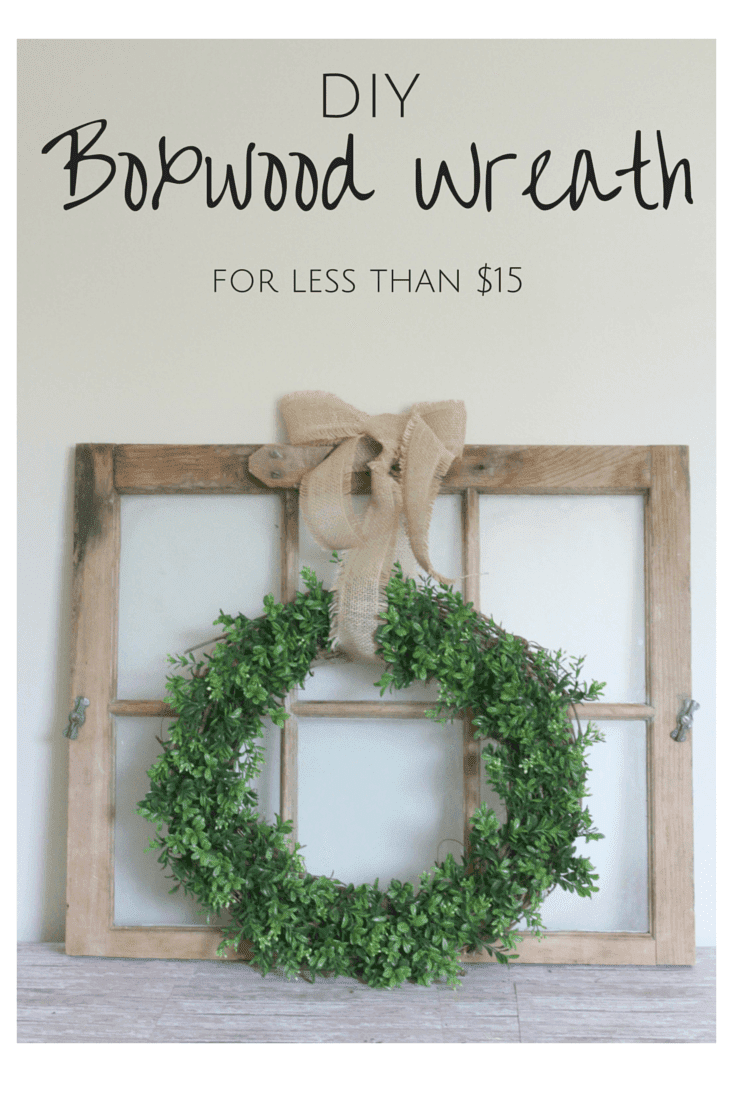
A few weeks ago, I kicked off our porch makeover with one of my very favorite projects yet and today the transformation continues with this DIY Boxwood Wreath … honestly, what porch would be complete without a pretty wreath hanging on the door? And for less than $15, how could I go wrong?

*affiliate links included for your convenience, click here to see my full disclosure policy
DIY Boxwood Wreath Supplies

I started by removing all of the greenery pieces from the garland by simply pulling them from their little stems.

Then, using my trusty hot glue gun, I began to glue each and every piece onto my grapevine wreath. The trick is to glue them all lying on their sides, facing the same direction.

I tried my best to stagger each one to avoid any really heavy or sparse areas and then, once I’d made my way around, I used the leftovers to add a bit more fullness where it was needed most.
15 minutes later and this is what I ended up with …


I’m SO, SO happy with how it turned out, but you’ll have to wait for the porch reveal to see it hanging on our door! If you’d like to follow along with our porch makeover just pop on over to Making it in the Mountains and you can also find us on Instagram or Facebook sharing all sorts of sneak peeks! And here’s a few of my projects for you to check out too:

Kitchen Table Makeover

DIY Ladder Shelf

Boys Bedroom Makeover
HUGE thanks to Emily for having me here today and wishing you SUCH a lovely day!


scissors

faux boxwood

grapevine wreath

hot glue gun


I love how this turned out! So pretty and it looks simple to put together too.
Thank you SO much sweet friend! It was the easiest project EVER and looks so pretty hanging on our door!
I love the wreath and that window it’s displayed on, beautiful!
Thanks so much Roxanne! It really did turn out perfectly and that window is my latest happy find from my newest shopping obsession!!!
Kristi, the wreath turned out super cute and there is no misting needed on this boxwood every few weeks! I always forget on my own preserved boxwood and some are now turning brown…sigh. This is a great option. I laughed when I saw that you plucked the faux greenery pieces from their stems-I thought I was the only one.
Ha! I actually searched hi and low for some boxwood pieces, so you can imagine how happy I was when I came across this garland and noticed how easy it would be to pluck apart! I’ve never had preserved boxwood, so I had no idea that it had to be misted … makes me even happier that I’ve got this low maintenance option ;) Thanks so much Michelle!!!
Such an easy tutorial Kristi!! Thanks for sharing! I really didn’t think about how easy it would be to make on of these for myself! lol.
Thanks Lindi! I’ve been crushing on them for years and had no idea making my own could be so easy!!!
Wow! I love this. It turned out great!
Thank you SO much Marie! It was such a quick and easy project and looks perfect hanging on our door!
I’m really excited about decorating my front porch when I move! A few months ago I bought a grapevine wreath on sale and have been trying to decide how to decorate it. I’m going to do this! I need to go to Michael’s soon anyway so I’ll grab the garland and maybe get something to accent it like a colorful flower or a monogram. I’ll be sure to share a pic on Instagram for you when it’s done! :)
Awwww, than you SO much sweet friend! I can’t wait to see how it turns out Jenna!
Ah! it’s lovely. I’ve always wanted to make one of these! What have I been waiting for? Thanks for sharing Kristi!
Thank you SO much Jennifer! It was so quick and inexpensive, I can’t believe it took me so long either!
Love! Super cute…and looks so easy to do!
Thank you Brooke! It really was super quick and easy and turned out so lovely!!!
Kristi! That is such a great idea! I love it!
Thanks SO much Rebekah! I’m so happy with how it came together!
Hi, Kristi ~ I love this wreath! I’ve been wanting a boxwood wreath for awhile now, but I just couldn’t justify the price. Now, I know how I’m going to get my wreath and stay within my budget! Thanks for the inspiration!
Oh good! I’m SO happy you love it Tiffany! Thanks girl!
This is one of those projects that makes you think, “Why didn’t I think of that?!” Thank you so much for the lovely and affordable inspiration!!
Ha, thanks Pam! I had that thought when my friend suggested looping the towels through so it can hang flat :) I mean, duh! #headslap
The wreath came out beautiful. I love Michael’s Craft store, that’s where I get all my crafts from. Thanks for sharing your idea. Love it!
Didn’t Kristi do an amazing job!! It’s so easy!
This is such a beautiful idea! I love boxwood wreaths and so making one is such a good idea. Thank you for sharing this craft!
It’s so nice to know how to DIY one! Kristi did such a great job!
What size wreath did you use?
Kristi says she used a 12″ wreath, but of course this can be done with any size you would like :)