This post was not only a welcome distraction from the horrendous “debate” on television last night, but it may just be one of my favorite DIYs of all time. It was a perfect storm of a MUCH needed update, a unique look that totally fits our style, and a process that was alot simpler than I anticipated (which is always welcome, right?).
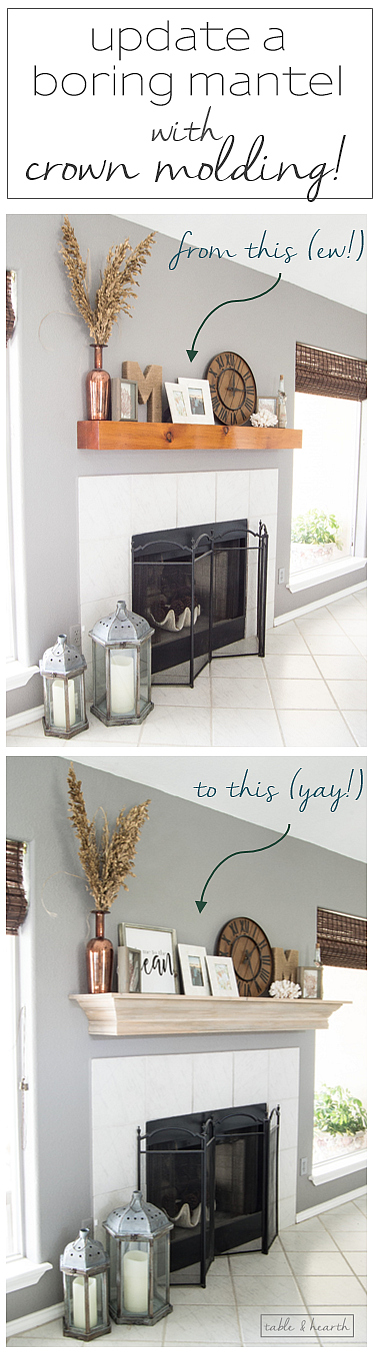
This hella orange minus sign of a mantel is what was here when we moved in and what we’ve lived with for the last six(!) years. If it were more of a natural/subdued tone I could have worked with it, but I just couldn’t do the orange anymore, especially after we’ve got our adjacent living, dining, and kitchen nice and pretty now. It needed some sort of DIY mantel update, and stat.
The “minus sign” seemed to be a basic square piece of pine that was just varnished like crazy. I’ve actually seen mantels like this alot so if you happen to have one of these that is less-than-stellar, this is a PERFECT way to update it, beef it up, and give it a whole new look!
There was nothing intriguing, unique, old, or special about it that would indicate it was reclaimed or anything so I didn’t feel terrible to modify/update it. Since it was just a flat bar, I did some measurements and found that I could put a nice wide board over the top, then wrap the three sides with a combination of moldings and completely cover up the old mantel and give the illusion of a completely new one. I thought about ripping it off and attempting to REALLY update it by building a full mantel with new tile and everything, but wasn’t sure if I wanted to tackle all that so it’s just going to be an update to what’s there for now. But don’t underestimate the change, I think it’s still pretty monumental :)
DIY Mantel Update with Crown Molding Tutorial
This method is of course customizable to your style based on the species/size/thickness of the boards and molding you use as well as the finish you give it, so tailor it as you’d like.
Supplies
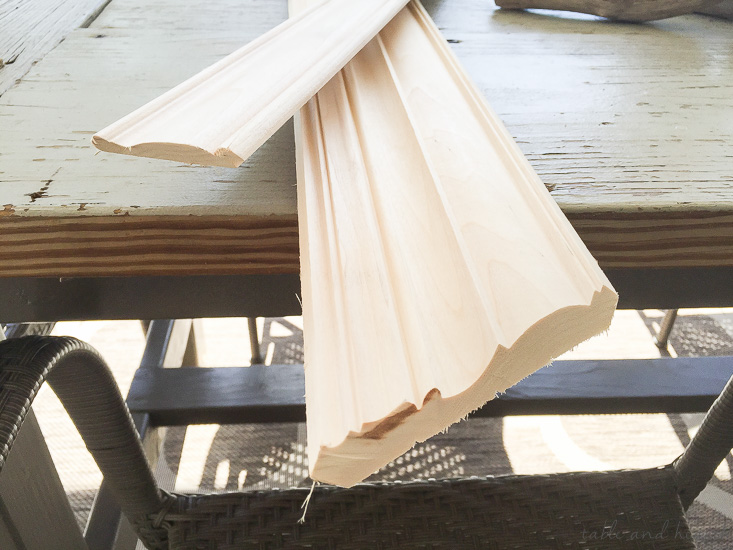
- thick crown molding
- flat trim/chair molding – if you need it based on the size of your existing mantel
- wide panel board
- nail gun (my fave since there’s no compressor needed!)
- palm sander (this little guy is invaluable!)
- compound miter saw
- speed square
- wood filler
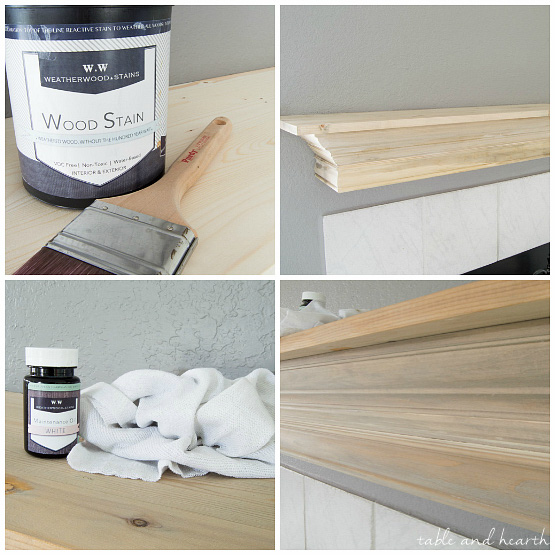
- stain or paint – I used my favorite driftwood “stain”
- top coat (optional) – I used this for mine
Instructions
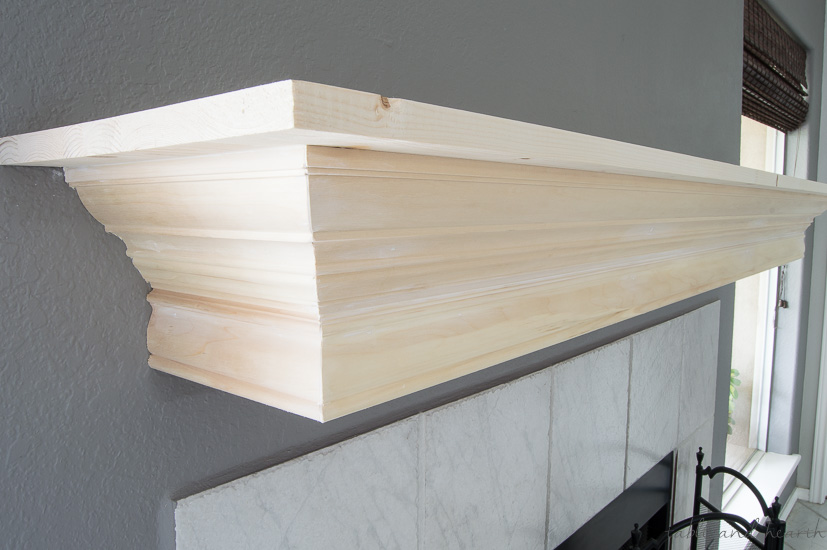
The first step is to get your new wider top board installed. I did some measurements with the crown molding I picked out to see how wide it needed to be in order to cover the top of the crown as well as have about a 1-2″ overhang. For mine that was about 12″ wide and 6′ long. I really wanted a board that was nicely finished already and one that was already the size I needed so I tried to find one as close to the measurements I took, luckily finding a 1″x12″x72″ pine hobby board!
The minus sign sloped a little to the front (shocker) so to get the new board level I installed these high-tech spacers…pieces of grippy drawer liner…along the front to raise it up some before nailing it down.
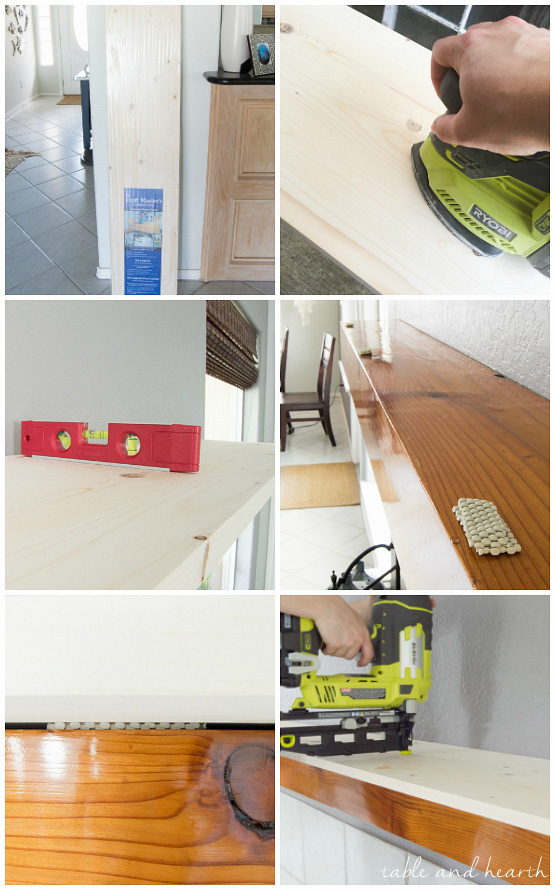
Then it’s time for the crown molding, eek! I don’t have alot of experience with crown molding so I grabbed a piece of cheaper crown to practice on from the store and did some studying of what angles/terms/degrees go with what side and where. It took MANY trial and errors but was actually kind of fun to try and figure out. One of the best tips I saw was to write the measurements of each variation of crown cuts on samples to save for later so I made some of those for the future (you can see them on the left). When I felt comfortable, I made the cuts to my real molding.

We dry-fit the molding before nailing it in to make sure the edges fit together nicely and if not, trimmed off a little more as needed. I suggest always cutting a little bigger than you measure first so that you can go down from there. Not gonna lie, we nailed the side pieces in at firs then had issues matching the front one up and I had to go get another full piece to re-do them. Hold up all three pieces and make sure they fit snugly before nailing any of them in. Wood filler will save you alot here, but if you’re staining like I did you’ll want them to line up as good as you can.
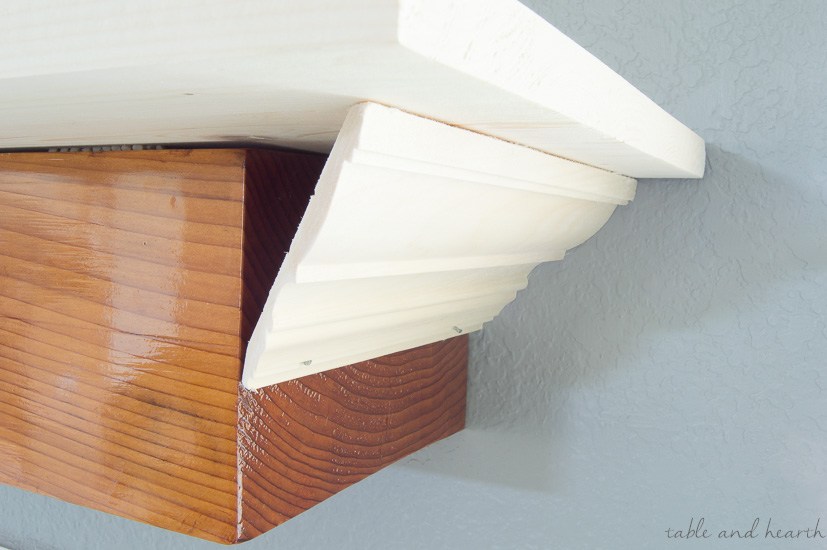
Once your crown pieces are in, measure and cut the flat pieces (if you’re using them) with a basic miter. Dry fit it also and then nail it in. Sparingly fill in any gaps and nail holes with the wood filler and lightly sand to smooth it out.
Clean the wood with some tack cloth to make sure it’s completely clean then either paint or stain it all based on what look you want. I chose not to do anything to the underside because it’s not really seen unless you’re sitting on the floor pretty much, but if the orange starts to wear on me eventually, my plan is to just paint it white instead of trying to fit a board up under there. If I do I’ll update this post for sure.
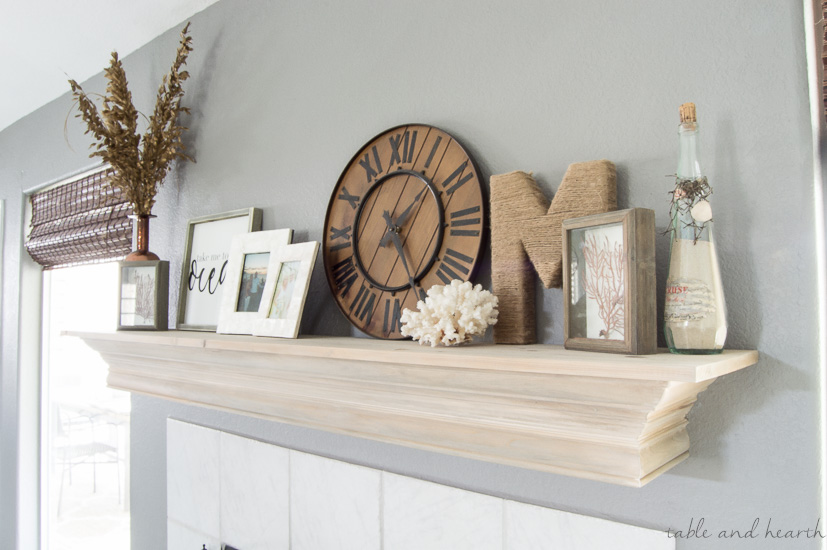
To achieve the driftwood look I had in my head, I used the super cool Weatherwood reactive stain and it’s white maintenance oil topcoat to further give it a slightly whitewashed look. Weatherwood isn’t a traditional stain, it instead actually ages the wood as it naturally would, revealing a species-specific grayish tone that looks EXACTLY like driftwood. It is so fun to play with this stuff because you never know what it’s going to do and the look is always unique (see my other projects with it HERE and HERE).
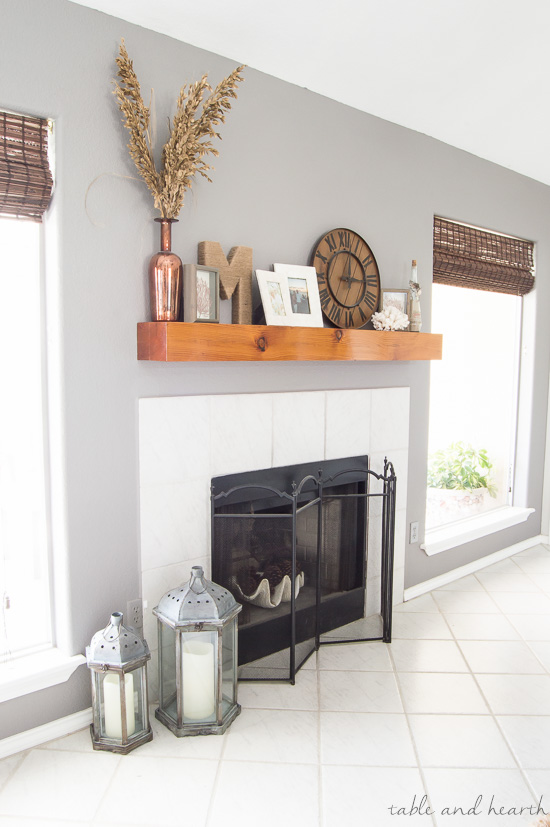
Just a day’s worth of work and we have a COMPLETELY “new” mantel that is our favorite light driftwood finish! It is so much bigger and beefier now and has a ton of space to display all the pretties on. We have already forgotten that there was a big orange minus sign there for so long. I can’t wait for Christmas when it gets all decorated!
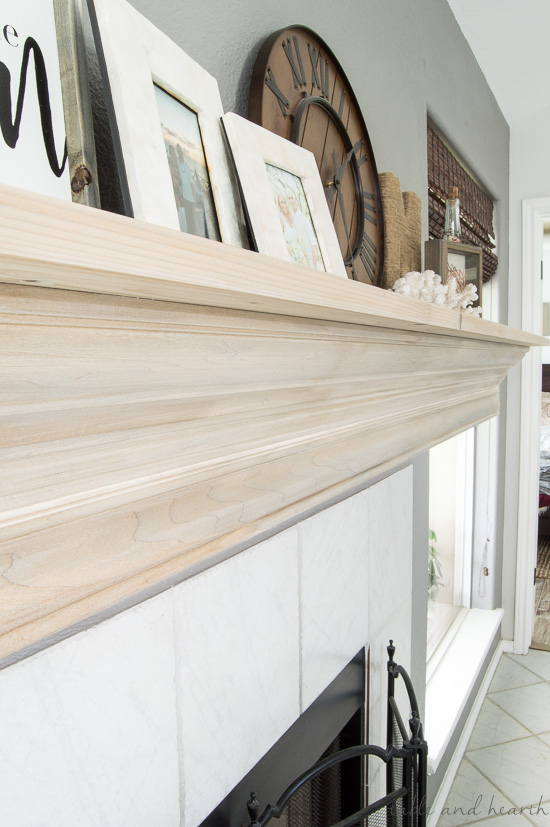
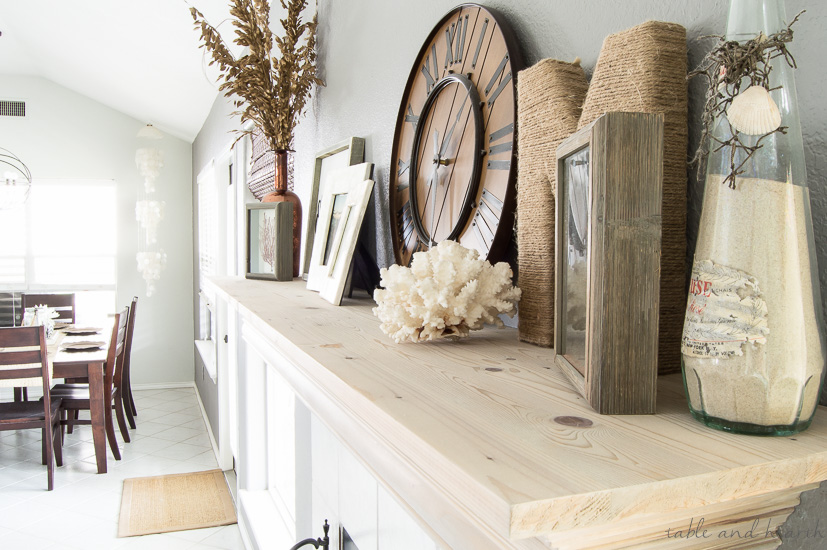

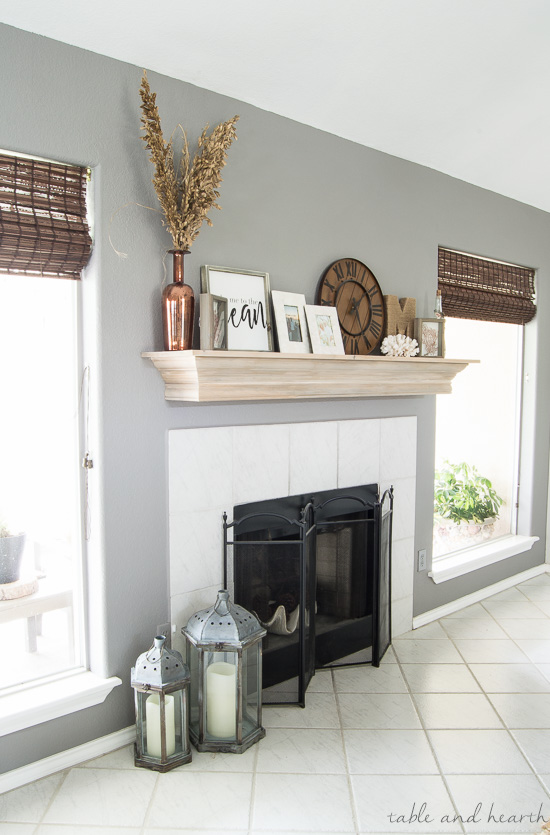


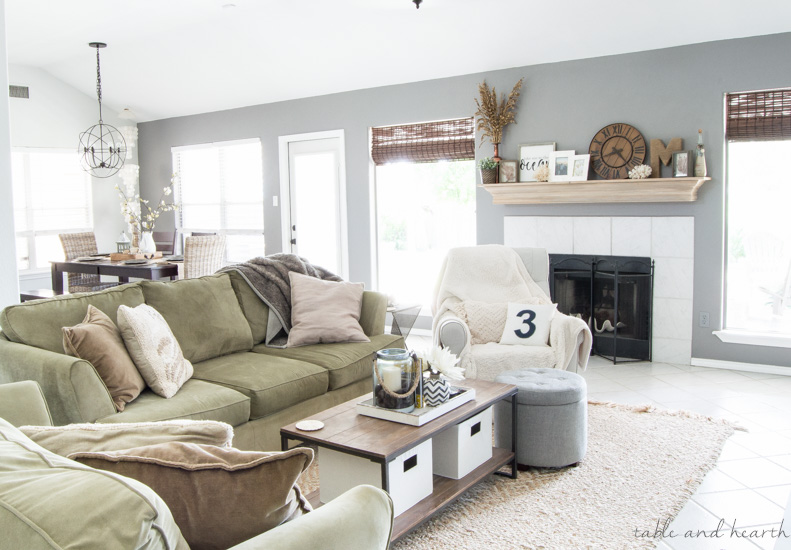
Just look at how beautifully it blends into our living room now :) And the size is immensely better!


I really was surprised at how much of an impact this made for way less effort than I anticipated. It’s a perfect solution for making over the dreaded “minus sign” without having to completely rebuild or purchase a new mantel!


Weatherwood stain

miter saw

speed square

nail gun

wood filler

grip drawer liner

Weatherwood white maintenance oil

thick crown molding

flat pine molding

pine project panel

sander


How to DIY Shiplap

DIY Farmhouse Table from Reclaimed Lumber

DIY Planked Privacy Wall


awesome job! like so..much better. doing mine now.