Monthly DIY Challenge time again!! This month we got to play with Mod Podge which somehow I have never used before, ever! I know, I pretty much should be banned from DIY/craft blogland for that. But after seeing what this miracle substance can do and how easy it is to work with, I’m sold and am sure it’ll be in the rotation from here on out.
**we were provided product for this project and affiliate links are included for your convenience as always. Thank you for supporting the brands that support this blog! Click here to see my full disclosure policy
We used different varieties of ModPodge like gloss, matte, and even dishwasher-safe (there are a TON!) to make 12 super creative and simple crafts this month.
Apparently I’m on a big glass recycling kick, with my upcycled seaglass mason jar project last month and now another glass project, using glass wine bottles. So, yet another upcycled environmentally-friendly project this month :) This idea hit me after seeing a video of making a bowl around a balloon using layers and layers of ModPodged confetti. I was intrigued at making a covering/solid substance out of something usually so fluid and fine, so I ModPodged beach sand onto empty glass bottles to use as vases!
I promise next month there will be no glass re-usage happening, promise.
Sand-Covered Bottles Tutorial
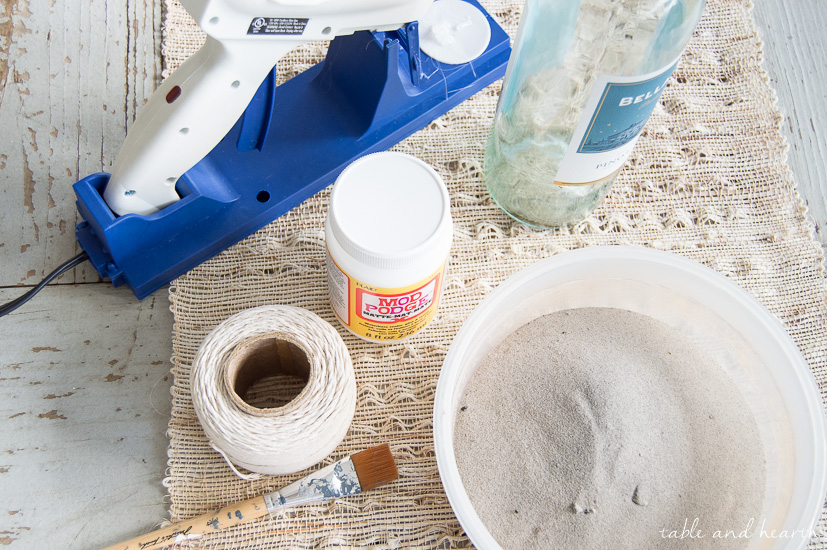
Supplies
- large empty glass bottles – wine, liquor, cooking oils, even mason jars
- fine beach sand
- ModPodge in matte finish
- small brush
- hot glue gun (optional)
- twine (optional)
- seashells (optional)
I used a wine bottle and a liquor bottle for this project but you can use any size or shape bottle you’d like, just make sure that all the labels and gunk are removed. I always use hot water and soap to get the paper off, then this spray to get the gunk off like a charm.
Instructions
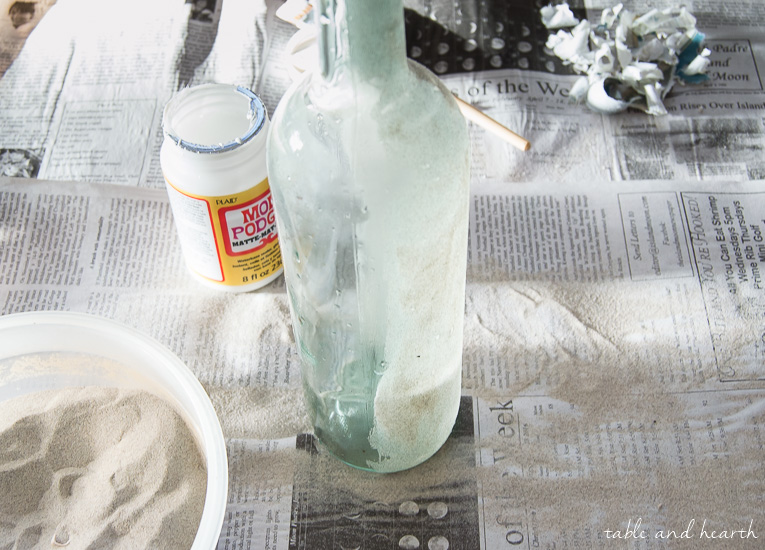
Lay out a bunch of newspaper or other base to contain the sand that will inevitably be everywhere.
Use the brush to put an even coat of the ModPodge over a section of the bottle. The ModPodge dried faster than I anticipated so I worked in small sections like this.
For each section, sprinkle sand over the wet ModPodge then shake off the excess. Keep doing sections around the bottle, standing it up to get it all. I tried to keep from overlapping the sections too much (the other layers will fill in between sections) because when I did it would result in thicker sections that were noticeable. Another technique may be to coat the whole bottle (quickly!) then roll the whole thing in sand.
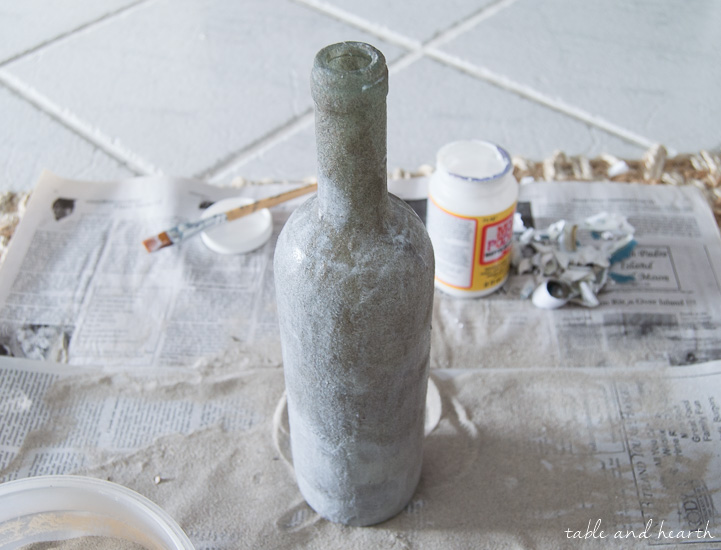
Let it dry (about 20 mins) and repeat as many coats as you’d like. I did three but they probably could have used one more. Once your last layer of sand has dried, brush another coat of ModPodge over the whole bottle and let it dry. This will seal your sand so they don’t shed everywhere. I strongly questioned if the ModPodge would really seal the sand so it’d be clean but I was super impressed, absolutely no sand comes off of these when they’re handled!
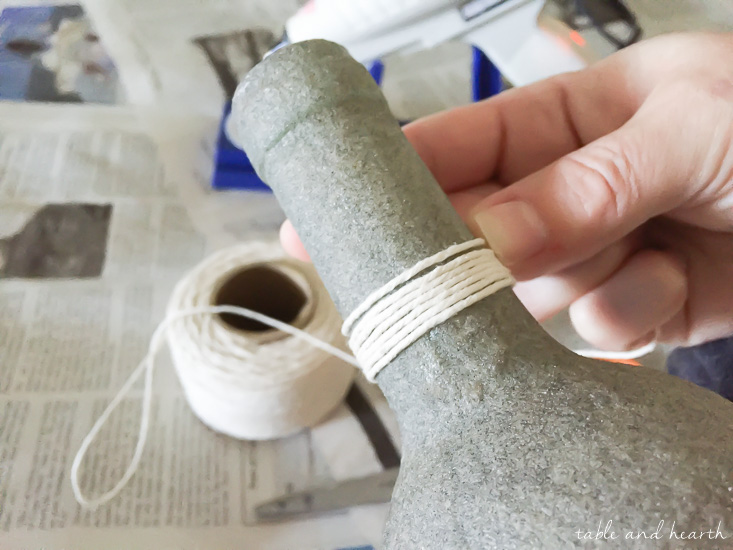
I thought they needed a little something still so I wrapped the necks with some cotton twine and glued a little sand dollar to each one. When in doubt, glue a shell to it I say…
I am stoked at how these came out and honestly am really surprised how well it worked! I anticipated a huge mess, a mushy disaster, and to always have to clean sand up around them but there’s none of that! Unexpected, natural, neutral, subtly beachy, and all for the cost of a bottle of ModPodge, some twine, and a little hot glue (well, plus the wine you drank to get the bottle).
Huge thanks to Plaid Crafts for this month’s challenge!
Learn more about ModPodge and see all the varieties and tools for it HERE
And see Plaid’s other awesome products and tons of craft and DIY ideas HERE
Now, a little something for you guys!! Plaid has put together a HUGE package to get you started on your next project PLUS a $50 gift card for any other supplies you need!! Enter below, then click the images to see all our other projects with ModPodge this month:








This is awesome, Emily! Your bottles are so pretty and SO coastal!
Thanks so much Bre!!
“When in doubt, glue a shell to it” haha – that’s a good mantra to have! I love how these turned out – gorgeous coastaly goodness <3
That should be my tagline ;) Thanks Erica!
These are so pretty! Perfectly beachy and I love the sand dollars.
I tried alot of shells but loved the sand dollars too :)
These are amazing! They kinda look like concrete which you know I love ;)
I knew you would ;) Thanks!
Blown away by this project! Seriously – such a neat idea… and they look great :)
Aw, thanks so much Erin!
Well, rest assured this is on my list to do! Christmas is coming and in my neck of the woods (west coast Florida) they would be so appropriate. BTW, thanks for giving us close up pictures. It really helps a lot to see the finished product up close and personal. lol Keep the great ideas coming.
They’d be great little gifts to give Linda! I’d love to see pics if you make them! And you’re very welcome, I wanted to try and capture the texture as best I could because from afar they just look concrete-y :)
These are SO cute and SO you! I love the addition of the sand dollar, and I second Erica’s tag line suggestion ;)
Ha, thanks Nicole!!
These are gorgeous, Emily! Love those little sand dollars too. You are so creative, friend!
Thank you Sarah!!
I love these, Emily! They almost look like concrete! I’m ready to test this out on basically everything now.
Crazy right?! It definitely spurred some additional project ideas here too :)
What if you used colored sand from $tree? for a bottle or two, mix up colors also in jar then apply to bottle? Seeing your gorgeous bottles got my head working with what if’s.
Don’t get lot of sand but enuf if mixing sand colors especially. What fun to experiment with this project. I too loved sand dollars on bottle necks with twine. Could use different colors of twine on bottle necks to contrast or match sand colors.
Now where will I get wine bottles as we don’t drink wine.
Hope you have awesome Fall weekend
Those would be so pretty too! And that would be a fun project with the kiddos :) And definitely any large glass container will work, like olive oil containers, large sauce jars, mason jars…anything you like!
Beautiful! I have an idea for brushing on the modpodge. I’d start at the top of the bottle and paint it on then add the sand, then as I got to the middle I’d start painting the glue in an ocean wave pattern and add the sand (maybe colored aqua blue) and let it dry, then repeat until I got to the bottom, overlapping as I go. This way it will resemble waves crashing onto the beach.
That’d be another pretty way, thanks!!
I was wondering if this would work on cheap plastic planters. I would love
to get the concrete look on those. Large planters are so expensive.
I think it would Joyce! It would take some time and a good bit of the supplies but I think it could totally work the same, go for it!