I’ve mentioned it before, but I’m not one for decorating our house for anything other than Christmas. Aside from not having the room to store stuff from another season (Christmas’ stash is already pushing it), the lack of a fall down here in south Texas makes it really hard for me to want to decorate for it. It was always my favorite time of year growing up in north Texas but it’s nonexistent here. Putting a simple slightly fall-inspired swag on our door is as much as I can usually muster up.
BUT, I was at the craft store a few weeks ago and their display of faux pumpkins in beautiful neutral velvet, jute, and knit fabrics all for 40% off stopped me in my tracks. I couldn’t resist. I knew it was futile, and that we don’t need to hassle with storing them, but they were just too pretty and perfect.
 *affiliate links included for your convenience, click here to see my full disclosure policy
I wanted a little bit of contrast among them but there weren’t any that were in pretty dark colors except the gray, so I started thinking of how I could modify some of the small ones that weren’t quite my style. I didn’t want to just paint them, and finally remembered those super cool Metal Effects kits from Modern Masters that we worked with a few months ago for our Monthly DIY Challenge. The “Rust” kit would give me the contrast I wanted by still having a fun texture to them that would fit into our “rustic neutral” dining table.

Rusty Pumpkin Craft Tutorial
Supplies
- Metal Effects kit – I used the “Rust” kit
- Faux pumpkins
It’s kind of silly to have a Supplies list because everything you’ll need is inside the kit; primer, paint, paintbrushes, stir sticks, and even the sealer! So all you need is the kit and whatever you’re going to paint, in this case it was my faux pumpkins.

Instructions
First step is to apply a couple of coats of their primer to whatever you’re painting, followed by a couple of coats of the specialized oxidizing paint.


Once your paint has dried for 12 hours, you’ll spray the rust activator evenly over the surface. You’ll probably want to do this outside, just because the spray gets a little messy. Oh, and make sure your spray nozzle is set to the fine mist setting, not the stream kind of setting. The fine mist will give a much more even and non-streaky finish.

After spraying them, let them sit for an hour or two until the rusting has fully happened and they’re all dry. Then, give them an even spray with the sealer and let that dry as well.

How cool is that?! I worked with the green patina kit before but I think this rust one will really be put to use around here. It’s great how you can control where and how much of the rust shows up on your piece.


I still may not be on board the whole fall decorating boat yet unfortunately, but I think adding a little fall tablescape with pumpkins in some good ‘ol neutrals and textures is just the little touch our house needed, to get us through till Christmas at least.
How about you guys? Is fall one of your favorite seasons to decorate for or do you save it all for the holidays?


dining table

woven dining chairs

pillar candles

pitcher

salt and pepper shakers

faux dogwood
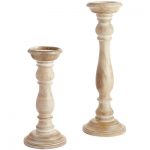
wood candleholders

jute runner

capiz placemat

wood dining chairs

chandelier

linen napkins

napkin rings

charger

wooden candleholders


Rustic Fall Door Swag

Shell Wall Hanging

Driftwood and Acorn Garland


LOOOOOVE how these turned out! SUCH a creative idea!
Thanks so much Kristi!!
They look absolutely amazing!!!
Thank you!
Very nice! Thanks for sharing.