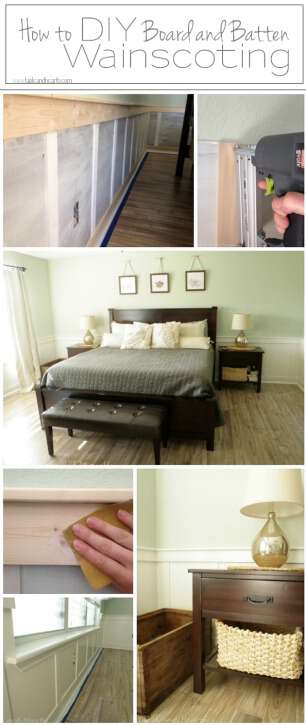
Whew! If ever there was a project I was relieved to check off my list it was this (so far). I started this project back on April 13th and through many, many evenings and the few weekends we weren’t out of town it is finally done! And man does it look good….
*there is a full supply list with the cost breakdown at the end of this post :)
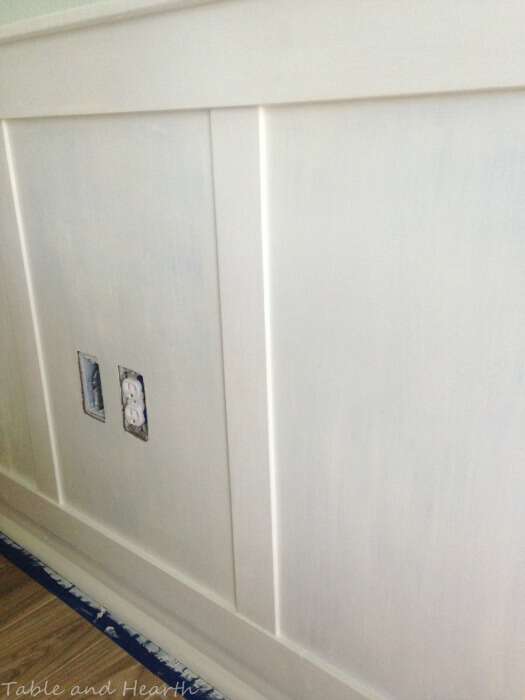
So, picking up where I left off from the first post on installing it, all the paneling was cut around the room. Then I started staging my battens. I had to go back and get more so some of them are primed already, some aren’t (I couldn’t wait so I primed them on the wall later). I settled on spacing them 16″ apart and used the ‘ol cut-off yardstick method of measuring. On the short walls, I wanted them to be centered so I set a batten halfway then measured 16″ from that one. I also didn’t put any too close to a corner, just left more space as I think it looks less weird that way. Spacing on some of the walls was tweaked off-center to allow for covering up panel joints and avoiding electrical outlets but you really can’t tell at all with all the furniture in place. I got lucky and only had issues with an outlet on the window wall, that’s where they’re shifted some. Once I got my spacing down, I got Shooter the nail gun ready, leveled each one, and shot a nail in the top, middle, and base of each batten.

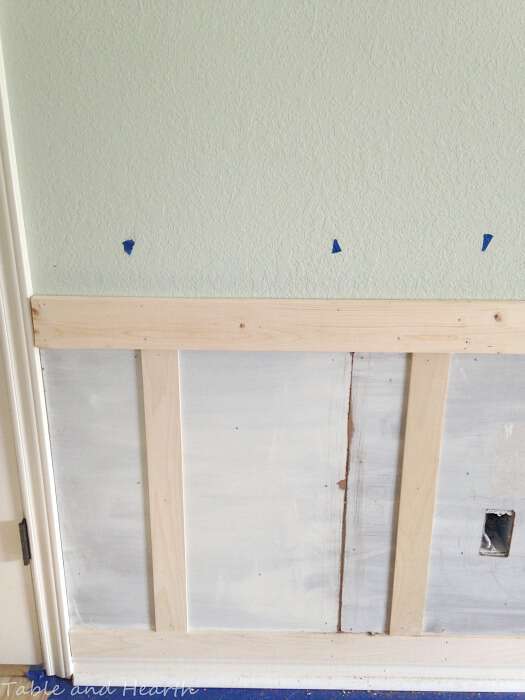
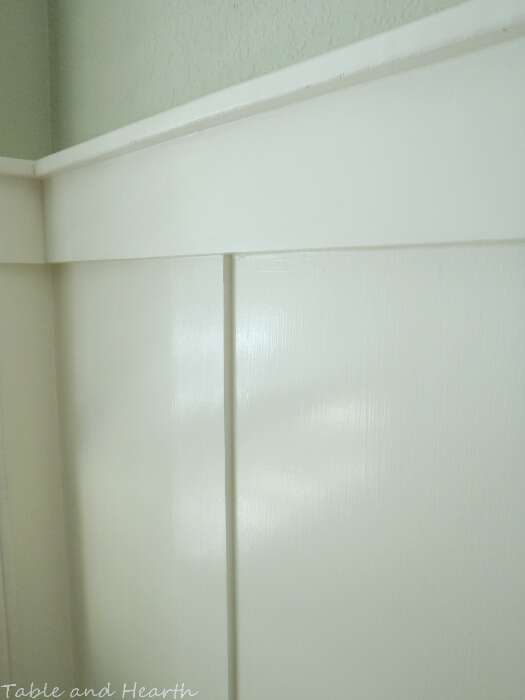
Then came the top 4″x 1″ board. I found it was easier to do the battens first, then put this level on top of all of them and go back and fill in any gaps during caulking. I nailed these into the studs (blue tape on wall) then intermittently in between. Unfortunately, some of these boards were warped and/or our walls were uneven so they took some finagling to get flush a few times and there are some not-so-pretty joints we won’t talk about. And you can see one of my pesky panel splits here, I think I ended up with three total that I couldn’t cover with battens. Oh, and I didn’t miter any corners for these horizontal pieces since you wouldn’t be able to tell once they were caulked and painted. Our secret.
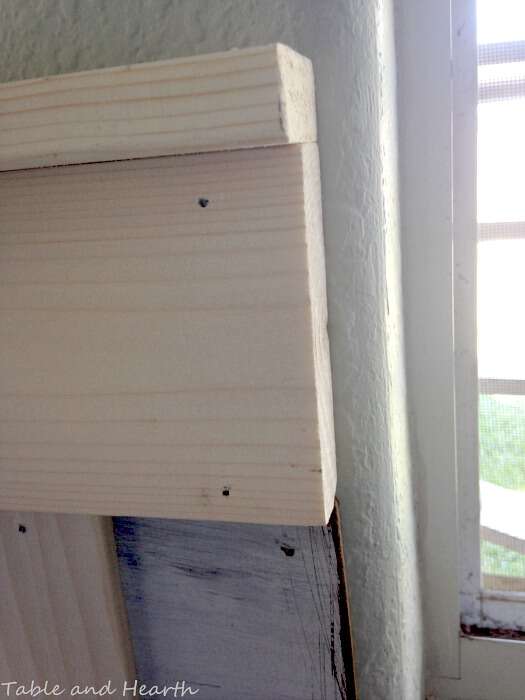
I chose to put a small ledge/shelf/trim on the top of mine but you can easily call it quits above to keep it flush. But choosing this meant that now I really did have to miter….dum dum dummmm. I was a mitering virgin, I was so stoked, then I lined them up…

Eh, so I’m not the best miterer, at least with a jigsaw. We don’t have a real miter saw, table saw, or anything serious so this was the best I could do. I promise the three others got better. At the exposed edges around the window, I just made everyone as flush and smooth as I could.
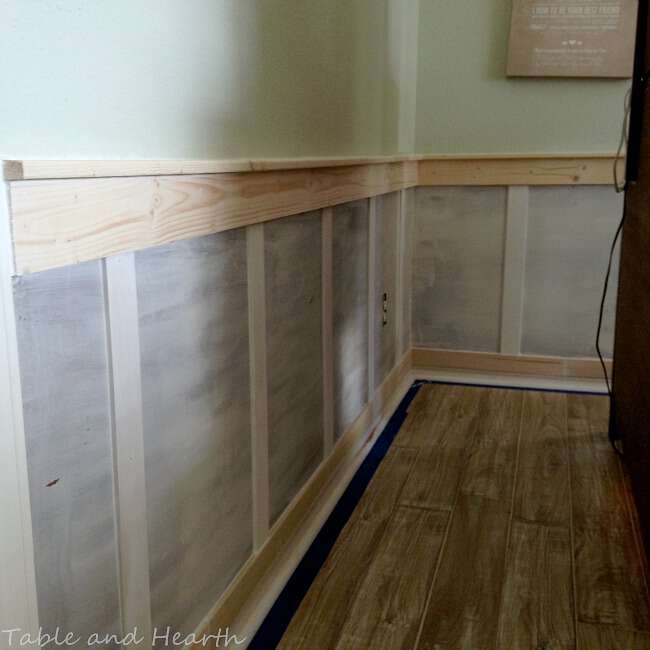
I was ready to spackle ‘n grout (sounds like a cartoon). I had to spackle ALOT!! This was the point I realized maybe I wasn’t doing such a great job this whole time. The panel joints weren’t that hard but my pain-in-the-ass cutouts around the windowsill of course needed some love as well as the un-flush base and top pieces (thank you uneven walls). Spackle is your friend in this, especially if you don’t cut as good as you think you do like I do or have uneven walls/baseboards like I do. I sanded the spackle down and got to caulking.

Caulking was NOT my friend in this. No matter how hard I tried, I always had excess on my finger which smeared on the paneling and I had to wipe it off. I thought I wiped it off good until I went to paint (more on that later).
I had primed the panels in the garage before installing them, along with some of the base pieces and battens. I got ancy and kept installing the rest without priming then primed them afterwards. I feel like I wasted my time priming the stuff beforehand since I had to scoot around and prime anyway so I suggest either priming all of it ahead of time or priming none of it ahead of time and just doing it on the walls, either way is more efficient than what I did I think.
Commence painting. I used a stubby 2″ trim brush for all of it as the spaces weren’t quite big enough to constitute using a roller. This is the first coat at about 11:30pm last Friday night, whoa! calm yourselves party animals.
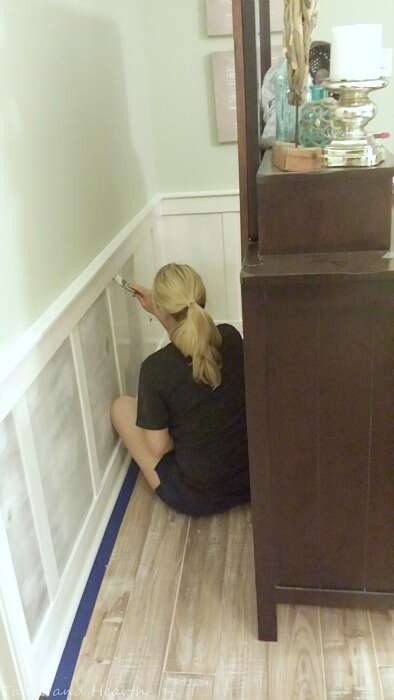
This is what I had after one coat. Not alot of coverage on the panels is what I had. It was clear this was not going to be a two-coat job on them.
So I did a quick sand of everything and did the second. And FYI, I don’t think this quick sanding did anything to help anything. And I still don’t think a roller would have helped with smoothness given all the corners to get into. This paint is badass but I still got brushstrokes.
The horizontal pieces and battens were good after two coats though, but the panels? not so much. THREE coats in and we were finally in business. Some (like the ones on the back wall on the right) still looked a little blotchy to me so I did a FOURTH coat, FOUR!! And this was good paint!! I called it quits after that, I just couldn’t scoot around that room one more time. I was D-O-N-E with this crapola!

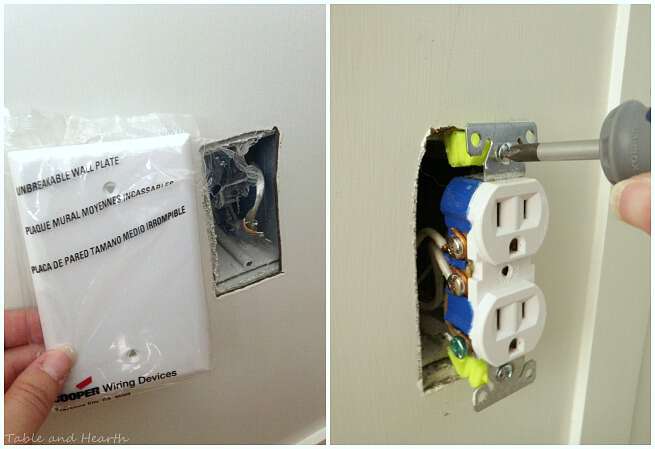
Although it felt like I was done at that point (and we had a party in four short hours) I had to trudge on and take care of the outlets. I chose not to replace the phone jack and just put a solid cover over it, then all the outlets got a couple of extenders. Out of seven outlet holes, only one ended up with a gap :/ Still need to fix him but he is behind the dresser so I’ve got time :)
So, before I get to the B&E extravaganza, let me vent about the main frustration in this project… the paneling. I used it because of how textured our walls are (you can see that in the pics above) but it ended up being such a pain in the butt. Now, there weren’t really any other options besides heavy wood panels to use so it’s not like I could have gone with anything else but I will still gripe about it. One, they are 4′ x 8′ and are cumbersome. Two, they put off a TON of dust when cut or sanded. Three, I used the brown and rougher backside which had stickers that removed the top layer when I took them off, so I had to sand those down. Four, they showed ev-ery-thang when I painted! I thought I had done a good job of smoothing out the caulk but apparently not. And five, the primer brushstrokes stayed through all of the sanding and painting, I feel I would have had a smoother finish if I didn’t prime these.
But in the end, it looks amazing! And our furniture and drapes cover alot of the “oopses”. Nobody should be analyzing this up close anyway, if they do, they can go you-know-what! This was a huge undertaking and was my first experience doing something like this, so I think it came out pretty dang good for that being the case :)


When we finally got to put all the furniture back the room felt HUGE! One, because we had been living with it all smooshed in the middle for over a whole month and two, because this wainscoting does miracles for the feel of a room. I think it brings your eyes down and wide to make the room feel more expansive. It just feels more cozy and put-together too, sort of elegant. Yes, I changed the bedspread and will be changing out a few more things in here to a slightly less beachy vibe, maybe getting some sconces, more artwork, and a detached mirror over the dresser.


Obviously this was a huge learning experience for me and I now know some things I would do differently and where I messed up, got to hasty, or got too tired and sloppy :) Now I know what to do next time! And isn’t what this is all about, learning how to do new things and trial and error along the way?
Here is the budget breakdown, again, for a 16′ x 10′ room:
Total Cost – approximately $350.00
$53.88 – 4′ x 8′ x 1/4″ panels x 4 ($13.47 each)
$43.78 – 4′ x 3″ x 1/2″ poplar slats x 11 ($3.98 each) – for the base rail*
$45.50 – 2′ x 3″ x 1/4″ poplar slats x 26 ($1.75 each) -for the battens*
$36.05 – 8′ x 4″ x 1″ pine planks x 7 ($5.15 each) – for the top rail*
$9.90 – 8′ x 2″ x 1″ furrowed slats x 5 ($1.98 each) – for the top ledge
$119 – nail gun
$5.98 – 2″ brad nail refills
palm sander – already had
$5.98 – Sanding pads
$5.17 – Outlet spacer pack
$2.67 – Longer screws for outlets
$0.94 – Outlet cover
$19.98 – Zinsser Bullseye 1-2-3 Primer – 1 gallon
$12.99 – DAP Alex Caulk x 3
Spackle – already had
2″ stubby trim brush – already had
Paint – Sherwin Williams “Westhighland White” – already had
Level, square, jigsaw, etc – already had
*This is the labeled size, real widths are 1/2″ less. Why do they do this?!?!
I don’t consider this a bad deal at all given the size of this room, especially when you take the nail gun out of the equation and/or some of the other supplies that most DIYers have on hand already like the caulk, nails, primer, etc. Granted, it was ALOT of woman-hours of labor to get it done but still. Now we get to sit (lay?) back and admire it and see it every time we wake up!
I hope everyone has an awesome extended Memorial weekend with loved ones. We will be spending ours in Houston for a friend’s party and making pit stops to Ikea AND West Elm!!! Yay!! This will be my first trip to a WE store and I foresee alot of squealing. Follow it all on my Instagram to see all the treasures we find :)


jigsaw

1″ brush

nail gun

4″ brush

stud finder

speed square

miter saw

paint

sander

hobby board

hardboard panel

level
caulk

spackle

primer

stubby brush
outlet spacers


How to DIY Shiplap

Coastal Farmhouse Bathroom Update

DIY Pergola


Love this!! What a great job on the wainscoting and fantastic tutorial. I really want to do wainscoting in our future nursery. Still working on convincing the hubby though. Pinning this in case I can convince him. :) I would love if you linked up to our Motivational Monday link party. It’s live all week long until Friday.
)
Thank you so much, I hope he gets convinced and that this will help you when he does :) It was definitely a learning process for me but I’m dying to do it again on a smaller scale, I LOVE it in nurseries! I would love to see pictures if y’all do it :) And headed to the link up now!
Wow! This really, really looks great! Nobody will ever notice your frustrating areas! I did my bathroom, which had SUPER textured walls (thanks previous owners!). I ended up using giant white board from Lowes and glued it to the wall, then a foam roller to paint. Still tricky on caulk, but easier to paint :)
Ah! I should have tried the smoother white side of mine then to see if it worked better! Next time :) And there should be a projects-over-textured-wall support group!
Your bedroom looks stunning Emily. The difference the wainscoting makes. Great job!
Thanks Michelle! It makes the room look bigger and more put-together. Wainscot all the rooms!
It looks GREAT! Great work!
Thank you Corrine :)
I do love wainscoting! Luckily my house came with it in some of the rooms – I’m impressed that you guys did it by hand :) Great work! Thanks so much for linking up at Link It or Lump It!
I am too Erica ;) The panels cause of the textured walls were the worst part!
Great post! I’m dealing with wainscotting in my kitchen…I just moved into a house and didn’t like the light honey color of the paneling so I tried stripping it and staining it a darker color…didn’t come out so good! Now I’ve stripped that stain and will probably just paint over it with a dark brown. These kinds of wainscotting that you put up are much more modern. It does look great!
Pinning this post through Pin Worthy Wednesday :)
How frustrating! Hopefully you’ll find something that works for you guys, wainscoting is such an awesome touch once it works for you :) Good luck and thanks!
Your walls look great! I did this in my bedroom last year. I love the look!
Thank you Lisa! It totally transforms it, huh?!
I love wainscotting so much, and I LOVE it in your room! You did an amazing job, I know it’s no easy task. So impressive! :)
It’s not at all but I’m hooked now, it’s going in all of our future homes :)
That looks wonderful! You did a great job! That was definitely a lot of work.
Yeah, I totally underestimated it in the beginning…though I’d be done in a weekend :) But it was all worth it, thanks Amy!!
Your hard work paid off! Looks amazing! Great job! Thanks for sharing with us at Your Designs This Time.
Thanks,
Emily & Erin
Thank you guys!!
What an amazing transformation! The room looks brighter and more polished. Great job!
It’s crazy how much of a difference it made Melissa! Thanks!
This is a great tutorial! I’ve been wanting to do this in my house for a long time, but I can’t figure out which room… Thanks for sharing and linking up at Way Back Wednesday!
Thank you Stacey! It makes such a HUGE difference in the room, good luck!!
I just want to say this post is amazing! Super detailed, super helpful, super everything! Picts are amazing and the supply list. Your post literally makes me think I can tackle this myself also! I sure am going to try! Thank you