This month’s Monthly DIY Challenge knocked out two projects, my challenge project as well as something I was really wanting for the nursery, I LOVE when that happens. (The nursery which by the way is pretty much 98% done just in time to show it to you guys in a few more weeks!) Our challenge item this month was basic 1″x2″ strips of lumber and as usual, the girls knocked it out of the park with their creative ideas! Check out this fun video that Erin put together showcasing all of our projects this month!

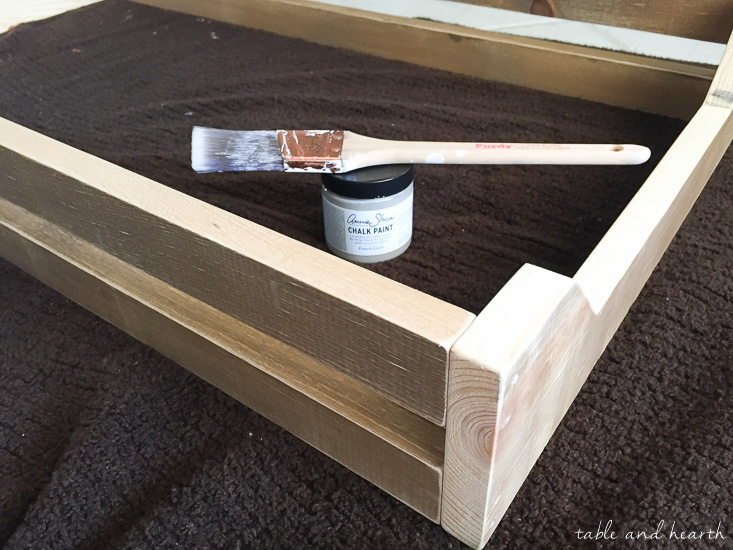
For some reason I’ve never been a fan of seeing a changing pad just hanging out on top of a dresser all by itself and really wanted something to contain and define ours as well as cover up most of the pad showing. However, I couldn’t find many trays online and was blown away that some of them were upwards of $100! WTH?! So I turned to my ongoing mission of whittling down my scrap wood pile and found a board and some 1×2″ pieces leftover from our privacy wall so it worked out perfect!!
How to Make a DIY Changing Pad Tray
I didn’t want my sides totally solid in order for any cute cover I got could peek through a little bit, so I used two 1×2″s on each side with concave-cut boards on the ends.
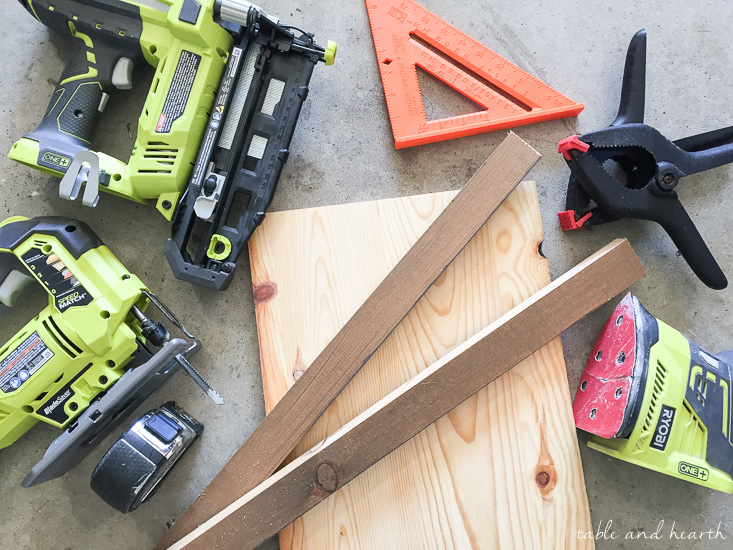
Supplies
- (1) 1″x2″x8′ board for sides
- (1) 1″x12″x2′ board for ends
- palm sander
- miter saw
- jigsaw
- nailgun
- measuring tape
- speed square
- clamps (if needed)
- wood filler
- paintbrushes
- paint and sealer of choice (I used chalk paint and this sealer)
Instructions
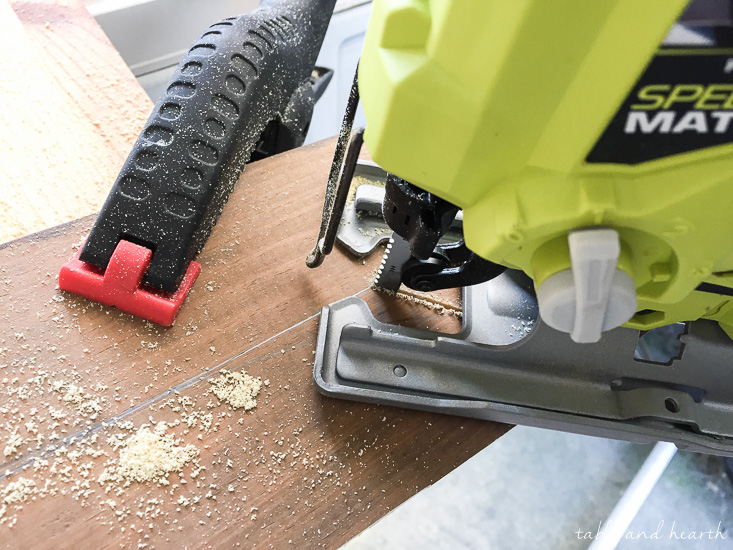
First I measured the size of our changing pad then made the tray pieces about 1/2″ larger around it on all sides, cutting them with my miter saw. I wanted the ends of my tray to be angled like the pad is so I traced the end of the pad onto the board and outlined some straight cuts to follow it (knowing I’d never be able to do an even curve).

Using the jigsaw I carefully cut out the angles on each end. Then used the first one as a template for the second and cut that out as well.
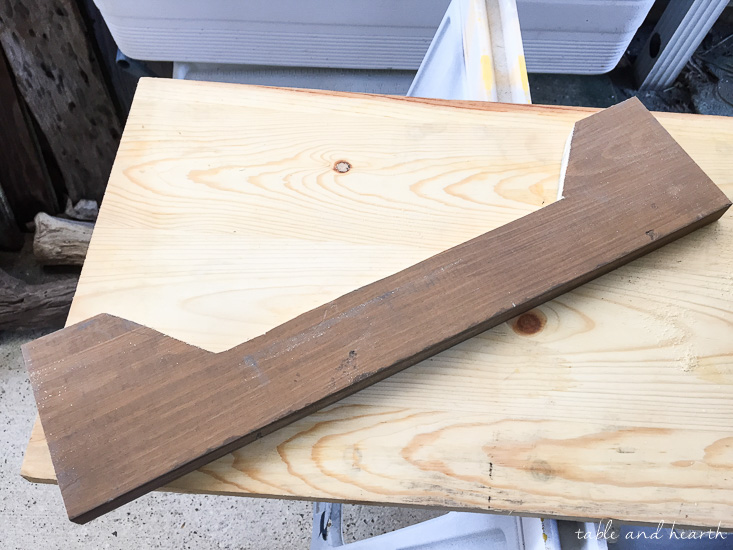
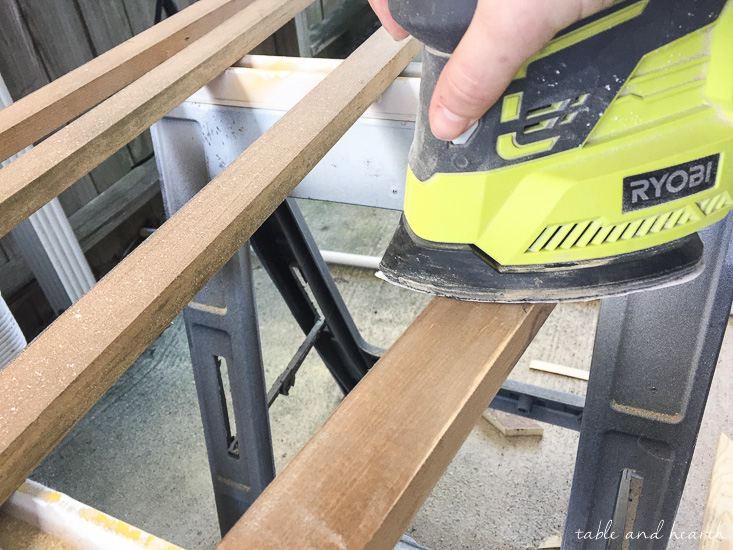
Once all my cuts were made I sanded everything to make sure all the edges were as smooth as possible.

Once sanded and cleaned, I set it up around the pad to double-check that the measurements were good then started putting it together. A couple of quick nails shot into the ends is all that’s needed! If you want a rustic finish you can leave the nail holes exposed, otherwise fill them with wood filler, let dry, then sand down again.

I actually really loved the look of the stained wood after giving it a heavy sanding but there’s quite a bit of weathered wood around the nursery so I decided to go ahead and paint my tray. I used Annie Sloan’s chalk paint in “French Linen” then sealed it with my favorite non-toxic sealer, Miss Mustard Seed’s “Tough Coat”. I seriously love that stuff.

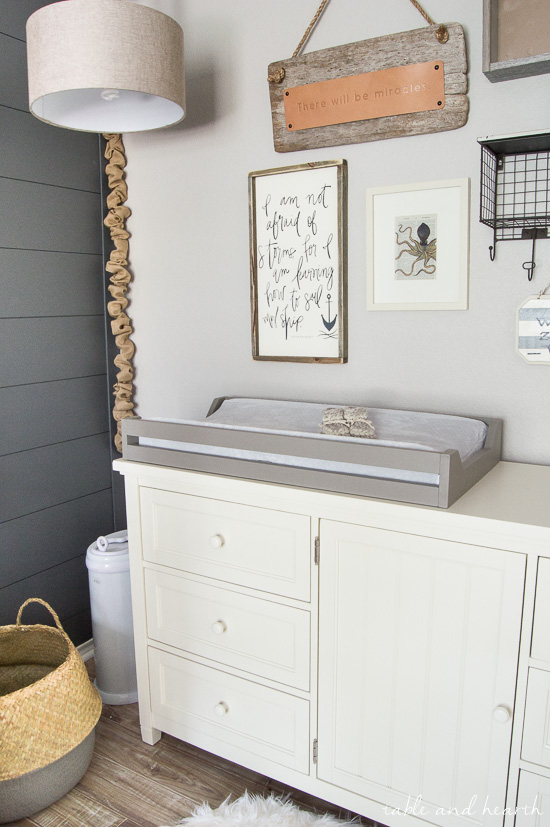
A couple hours one afternoon and we’ve got ourselves a pretty snazzy looking changing pad tray, probably for well under $20 if we had to buy the wood new! MUCH better than $100 I’d say. The taupe/gray color works perfectly in our coastal and neutral nursery and I like that you can still see some of the pretty cover too. It also adds a nice movement boundary around the pad which makes it feel more secure but I’ll probably put some additional grippy pieces under it to help it stay in place even better (the pad has rubber grips on the bottom).


I’m so happy to have another thing checked off the nursery list and especially happy that it was totally free by using wood out of the scrap wood pile! Plus it’s a look I was hoping to be able to have for our space. I wish all of my DIY ideas would go so quick and easy ;)
Now hop around to see what the other girls made out of their 1x2s, just click on each image below to be taken to their post:


jigsaw

miter saw

nail gun

sander
1″x12″ board

1″x2″ board

speed square

tape measure

tough coat sealer

1″ brush

exterior wood filler


burlap cord cover

seagrass basket

seagrass basket

dresser

iron convertible crib

diaper pail

pendant light

wall cubby

jute and wool rug

quote sign

changing pad cover

glass jar

cubby half bin

narwhal light

faux sheepskin rug

metal caddy

octopus print


Nursery Update II

32 Week Bumpdate

Hanging Closet Storage Crates


Share this!
This turned out so good Em! Can’t wait to see that little babe in there!
Thanks Bre!! I can’t either ;)
This is such a cute and functional idea, and I am loving seeing your nursery come together! Can’t wait til that sweet babe is here!!!!
Thank you Nicole!
Aw this is so cute and the room is looking FANTASTIC!!! This is one lucky baby!
I’m totally jealous, I’ll admit :)
It’s all coming together SO perfectly! LOVE that sweet little changing table!
Thanks Kristi! So happy to have it all ready!
You’re making MY arms ache for a baby with all this cuteness overload! So adorable!
Ha! We are SOOOO ready to make use of all of it!!
What a wonderful addition to the changing table, plus the coastal mood you got going. Very serene. Great job!
Thank you Juanita! I didn’t intend for it to have as much of a coastal vibe when I started but I just can’t help myself :)
Love this layout for the DIY pad tray. It is on my dads to do list for our nursery. Also totally love your look for the nursery, giving me some ideas for our own. What brand/color did you use for the walls?
Thanks so much Jamie! The walls are Peppercorn and Alpaca from Sherwin-Williams, you can find a full list of sources in the nursery reveal post HERE :)
Love it! Making one for my first grandbaby :) What type of grips did you use to keep it attached to the dresser? Thanks for sharing!
Aw, congratulations DeeDee!! For grip I actually just put a dollop of hot glue in each corner and it has worked great as long as I rub dust off of them every once in a while. You can also buy little clear plastic dots that do the same thing.
Amazing little DIY project Emily.
I loved it. I ended up buying one at IKEA … (for lack of time to do my own for my baby girl)
But now that I’m less busy … I might make one for my sister’s baby :)
Thanks,