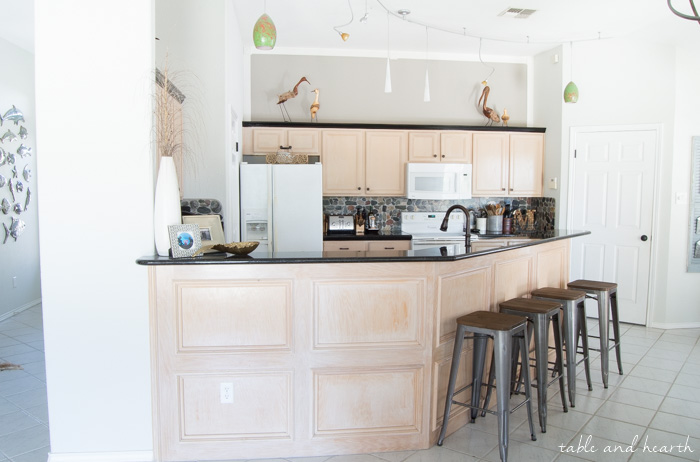
The biggest part of our recent kitchen makeover was of course painting the kitchen cabinets (although that door gave us quite the headache). While I was glad our cabinets weren’t the dreaded orange honey oak, the super-pink pickled oak wasn’t that much better. We toned it down a couple years ago by painting over the walls which were the same color, but the kitchen still never felt like our style.
So this spring they got painted a beautiful warm light gray when I embarked on a full makeover to transform our kitchen into a beautiful rustic gray farmhouse-inspired space. You can find all the posts in the kitchen update series by clicking on the below images:
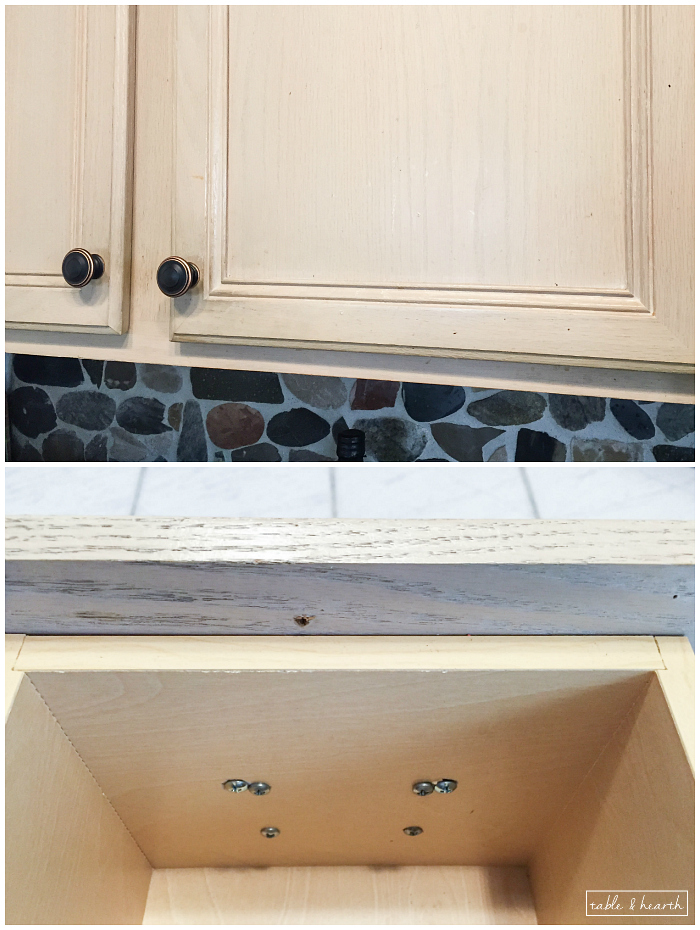
Sure, the cabinets looked great from afar but up close they were a hot mess. I don’t think they’ve EVER been cleaned…I know I never gave them a good scrub and I cook like a crazed messy woman. There was so much grime and splatter built up and in places I’m not sure how. There was also alot of deep open grain which either resulted from damage (it wasn’t by water though) or just poor finishing in the first place. Whatever all of it was was UGLY.
I finally had enough! I started doing research and formulating a plan to restore and refinish them so that they would look great once again and last us for a LONG time! This was by far my biggest DIY to date, and while I know there are approximately 3948578392 cabinet painting tutorials out there, I really want to share how I approached ours AND give you guys a cheat sheet to print out for when you tackle your own, which you can grab at the end of the post!!!
*affiliate links included for your convenience, and some product was provided for this project. Click here to see my full disclosure policy
Supplies Needed for Painting Kitchen Cabinets
- liquid deglosser
- TSP cleaner
- rubber gloves
- dust mask
- wood filler or spackling
- tack cloths
- painter’s tape
- box cutter/xacto knife
- plastic sheeting/tarps
- sawhorses/boards
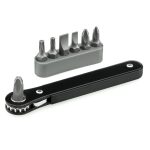
- right angle screwdriver (if needed)
- sanding sponges in 180 and 220 grit (these worked best for me)
- permanent marker
- palm sander in 220 grit
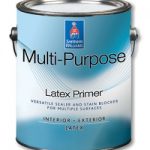
- primer – I used Sherwin-Williams’ Multi-Purpose Latex Primer
- paint – I used Sherwin-Williams’ ProClassic Waterborne Acyrlic Latex in “Repose Gray”
- paint sprayer with cleaning kit
- high-quality paintbrushes
- water
- vacuum with extension and hand vac
- plastic baggies
- drill/screwdriver
- small felt bumpers
- towels
- beverages of choice
- a really good playlist
My Impatient-But-Meticulous Guide to Painting Kitchen Cabinets
Since our cabinets weren’t so great in a few areas, I wanted to make sure I did the best prep work I could, but also keeping it within my means for a doable DIY. While it would have yielded even better results, I didn’t have months on end to spend completely sanding the finish down and filling in all the grain or gaps in the trim. All the work would have to be done on weeknights after work, on the weekends, and any time off I could squeeze in. Plus, I had procrastinated so long that it was now early summer and in the 90s everyday…i.e. about 838372 degrees in the garage where I was spraying so I almost died. Definitely try to plan this for a decent time of year! I decided to use latex paint instead of enamel because of how much easier and quicker clean up would be. My sprayer has a cleaning kit that attaches to a water hose so clean up takes all of 5 minutes tops, which means LOTS of saved time between coats.
A good cleaning, quick degloss, quick sand, and filling where I needed to was all I did to prep the surfaces for the primer, both on the doors and on the frames/bar wainscoting. Our kitchen has a good amount of cabinetry (37 doors/fronts to be exact) so I split it into two sections because I would have had to murder-scene sheet up the entire garage to fit all those in there for spraying. Plus it let me have only half of the kitchen destroyed at a time which makes for a *slightly* happier husband.
*remember, I’ve got a handy-dandy printable of all the supplies and steps at the end of the post!!!
Ok, let’s do this!!!
1. Getting Started
- Make a drawing of the kitchen and number all doors/fronts in numerical order (1,2,3…32). Numbers are much easier than “left of stove, bottom” and other notations like that. Keep it simple!
- Label each door/front with its corresponding number using painter’s tape. This works for both the doors and fronts and is easy to move to the side not being worked on when you’re painting later (versus labeling in a hinge hole that can get painted over)
- Remove the drawer hardware and store in its corresponding drawer. Unscrew the drawer face and keep those screws in the drawer as well
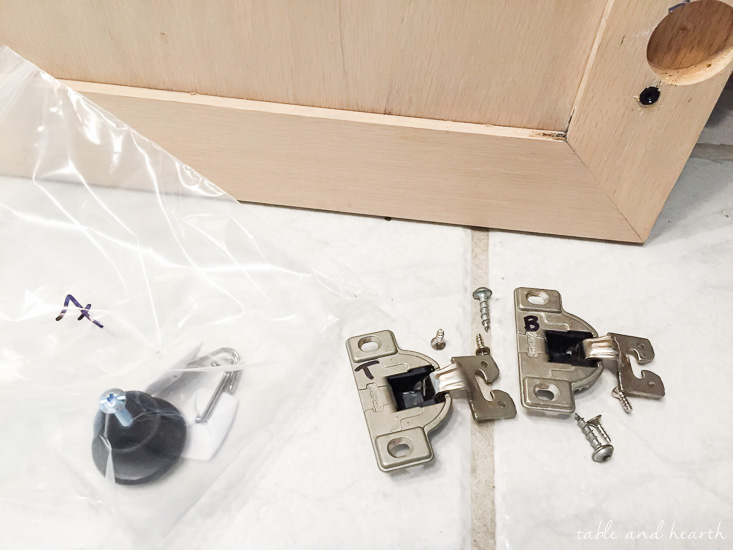
- For the cabinet doors, label a baggie with its number, then write a “T” for top and “B” for bottom on the respective hinges. Unscrew the door from the frame. Place all the hardware and hinges in the bag and put the bag in that cabinet.
2. Frames
- Once all the doors/fronts and hardware are off, tape up all the edges and around drawer guides. I didn’t paint the inside of the cabinets (#aintnobodygottimefothat), just the wood facing around them.
- Clean the frames with the TSP cleaner then with the deglosser using gloves and disposable rags or crappy towels. Be careful with the deglosser…there may or may not be a corroded circle on our dining table bench from where I sat a towel that had deglosser on it I didn’t know about :/
- Use the wood filler to fill any blemishes, deep grain, or gaps in trim
- Either remove the contents of your cabinets (#nope) or cover them with old towels to keep from getting sanding dust all over your dishes
- Sand all surfaces of the frames with your palm sander using 220 grit (or 180 and then 220 if there’s a rough spot)
- Vacuum the dust then wipe everything with a tack cloth **whatever you do, DEFINITELY do the tack cloth wipe, it’s insane how much dust these things pick up even after you’ve vacuumed. I had no idea how much of a difference they would make and regret never using them on projects before!
- Apply your primer coat with a brush and let dry
- Lightly sand with a fine grit sanding sponge, vacuum the dust, and wipe with a tack cloth
- Apply your first coat of paint and let dry, then repeat sanding procedure
- Apply the second paint coat and let it cure for a day or two. If doing a third coat, repeat the sanding process before applying it
- Once done, carefully remove the tape
3. Doors/Fronts
- Clean all of them with TSP then the deglosser using rubber gloves and rags or towels. (Just move the tape label to whatever side you’re not working on throughout this process)
- Use wood filler to fill any blemishes, deep grain, or gaps in the trim
- Sand all surfaces with the palm sander using 220 grit (or 180 and then 220 if there’s rough areas)
- Vacuum the dust then wipe everything with a tack cloth
- Set up your spraying area with plastic sheeting if you need it, boards across sawhorses to hold them, or boards across coolers and/or other wood pieces. Anything to get them up off the ground and preferably high enough where you don’t have to bend over
- Thin your primer with water according to your sprayer’s directions (*you may prefer to use distilled water if your tap water has a lot of minerals/chemicals in it)
- Test spray to make sure everything is working fine before spraying your pieces
- Apply the primer coat on the backs and let dry, flip, then apply to fronts and let dry (you always want the last side you do to be the front so it dries facing upright)
- Lightly sand with a fine grit sanding sponge, vacuum dust, and wipe with a tack cloth
If you will be using more than one gallon of paint (mine ended up taking just a little over one gallon) you’ll want to mix the gallons together beforehand to make sure they’re a consistent color. Sometimes two gallons can be slightly different and you’d hate for some parts of the kitchen to be a little off.
- Thin your paint with water according to your sprayer’s directions
- Spray your first paint coat on the backs and let dry, flip, then spray your fronts and let dry, then repeat sanding procedure
- Spray your second paint coat on the backs and let dry, flip, spray your fronts and let dry
- If doing a third coat, repeat the sanding process before applying it (I did three coats on my fronts)
- Let cure for a day or two. If it’s hot where you painted them, bring them inside and they’ll cure faster, just make sure they’re protected.
- Carefully reinstall them onto the cured frames and put the knobs and pulls back on. Add little felt bumpers to the corners to keep them from sticking if needed
Congrats! You’re done! Now get an icy beverage and admire your hard work!!
During this whole process, try to stay sane as your kitchen will be absolutely destroyed for at least a few weeks depending on what you can get done in a day, but just remember it’s ALL totally worth it the second you put that first batch of doors on!
The finish from the ProClassic paint was AMAZING, both with the sprayer and with the brushes!! Using a sprayer and using super high quality brushes makes all the difference in the world (this short-handled one was my favorite for the frames!). It is so SO smooth, I really tried to translate the finish in the pics. I got the satin finish because I didn’t want there to be too much sheen BUT I do wish I had gone with semi-gloss just to have a slightly more durable surface. We haven’t had any issues at all, but I just feel that the satin may not resist dirt and scratches as well and will be slightly harder to wipe down. But time will tell. Sherwin-Williams also now offers the ProClassic in a water-based acrylic alkyd enamel which may have an even more durable hard finish if you want to check that out too.
I didn’t fill any of the grain unless it was super deep and kind of banked on the paint filling in alot of it, but some of the doors stayed pretty pronounced. If you’re really anti-grain you can look into products made for filling it in, I don’t mind it too much and definitely didn’t want to add that other step to my process, but there are a couple of doors I probably should have done it to. My friend Nina did fill hers and has a bunch of great information on her process HERE.
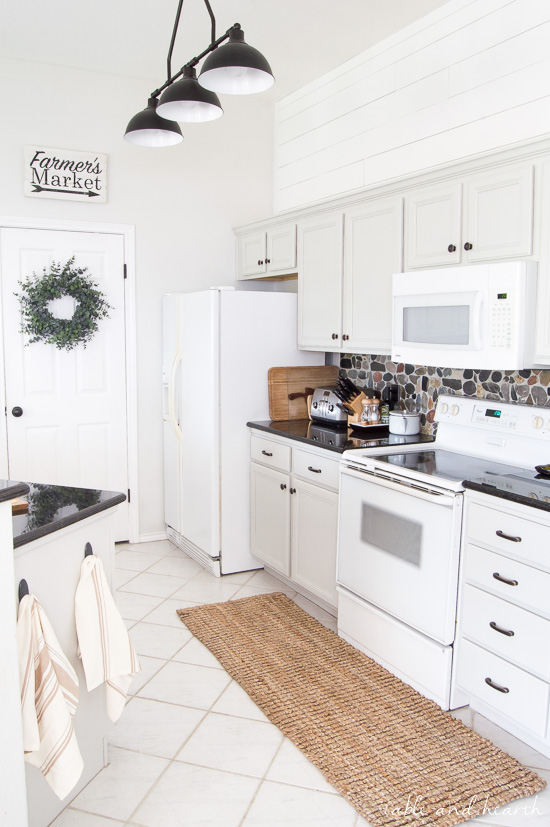
All those hours of dying in the garage and incessant prepping was TOTALLY worth it to completely transform our kitchen into this! I hate that I waited so long to do this but thank goodness it’s finally done, all we have to do now is kick back and enjoy our “new” kitchen.
** Sources for all the decor/fixtures in the kitchen can be found on the reveal post HERE or in the gallery below**
Now, I KNOW this is a huge and daunting project, so I made you guys a cheat sheet that has a full checklist of all the supplies you’ll need, PLUS tables of all the steps so you can easily see where you’re at and make sure you don’t skip any steps (plus it always feels good to check things off, right??)
Click the button below to grab the PDF and get started!
Huge thank you to these awesome project sponsors!
























It’s beautiful. Good job!
Thank you :)
This is by far the BEST guide to painting cabinets I’ve seen! Brilliant my friend! You’re kitchen looks ahhhhmazing girl!
Thank you Kristi!!! Anything to make it easier and smoother for others attempting it!
You described my DIY work style to a T. LOL!
Bahahaaa!!! Happy to know there are others out there like me :)
It turned out amazing! So daunting, BUT so worth it. I was waiting for this guide bc I am the same way; I want our kitchen cabs to look fab but also have no patience! Thanks for sharing all your knowledge!
It definitely was daunting, and for a good while I felt like it would NEVER be done, but then almost overnight I was in the home stretch and could see the end! That’s why the list helped me so much, because even if all I still saw was disaster, I still knew I was kicking ass in some way :) So hope it helps Jennifer!!
what is the backsplash called and can i get it at any Lowes or home depot?..i loooove it..been looking for the pefect one and you found it..Im doing mine in gray, white farmstyle also…love your inspiration and style…you kicked ass on that beautiful kitchen ;)
Thanks so much Margie!! The backsplash was here when we moved in so I unfortunately don’t have its exact source and haven’t seen it in our big box stores locally but it’s worth a check. The best selection of similar styles I’ve found are at Wayfair here (aff link): I’d love to see pics of your kitchen when you’re all done!
What a fabulous tutorial — informative, clear directions, and amusing! Thank you! Your cabinets look fantastic… and I’ve got to ask about your backsplash: it’s a perfect fit for your kitchen. Love it, love it, love it! (want it!)
Aw, thank you Susan!! We’ve definitely grown to love the backsplash a lot more now that it’s not overshadowed by hideous cabinets :) It was here when we moved in so I don’t have the exact source but I’ve found many similar styles at Wayfair here: (aff link) , hope that can help!
Thank you so much for the in depth posting, I feel confident now! Blessings!
Yay!! You’ve got this Valarie! It took me a long time to be ready to tackle it and breaking it down so specifically is the only way I felt like I could get it done :)