This month’s challenge item is maybe my favorite tool in the garage and I’m always excited when I have an excuse to bring it out. It especially makes me happy that this challenge introduced some of my fellow participants to this tool for the very first time and they’re absolutely hooked!
 *this challenge was sponsored by Kreg and affiliate links have been used for your convenience. Thank you for supporting the brands that support our blogs. Click here to see my full disclosure policy
I had never heard of a pocket hole or a Kreg jig until a couple years ago and was really confused by what the heck it was and what the heck it did. Then I attended my first Haven conference where Kreg was a sponsor so I made a point to visit their booth and finally learn all about this mysterious item. And, you guys, it is the easiest, most versatile and handy little thing EVER. I had no reason at all to be so intimidated by it and still feel foolish for being so scared (I do this with far too many things in my life actually…).
We have a large blank wall in our living room that I use to display three vintage oars I’ve collected over the last few years. They are the perfect size for such a large wall, however, my mounting technique for them was to have them precariously balancing on a couple nails each. Not the smartest or most secure way to display them for sure and after the 3475th time of knocking the bottom one off walking by it, it was time for a solution. So my project for this month was to Kreg jig together a large planked board to mount them securely to.
How to Make a Large Wall Display Board
Supplies
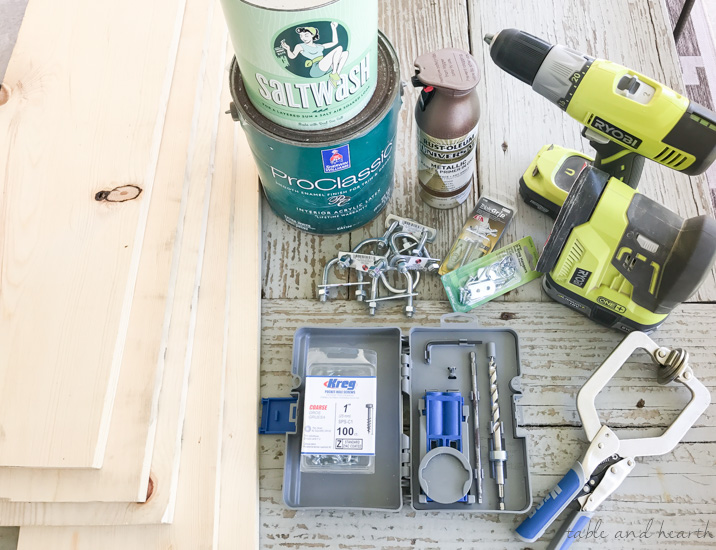
There’s really just a few supplies needed for this and it can be a great way to use up scrap or reclaimed lumber as well as extra paint. I almost used some old fence boards for this but decided to go with these 1x6s so that I could play with a new painting technique as well.
- Kreg R3 jig with clamp
- Kreg screws – my boards needed 1 1/4″
- boards – I used 1″x6″x72″
- U-bolts
- palm sander
- drill
- metallic spraypaint (optional)
- tabletop spray tent (optional)
- Paint and painting supplies (optional)
- mounting anchors, screws, and D-rings
- tape measure
Instructions
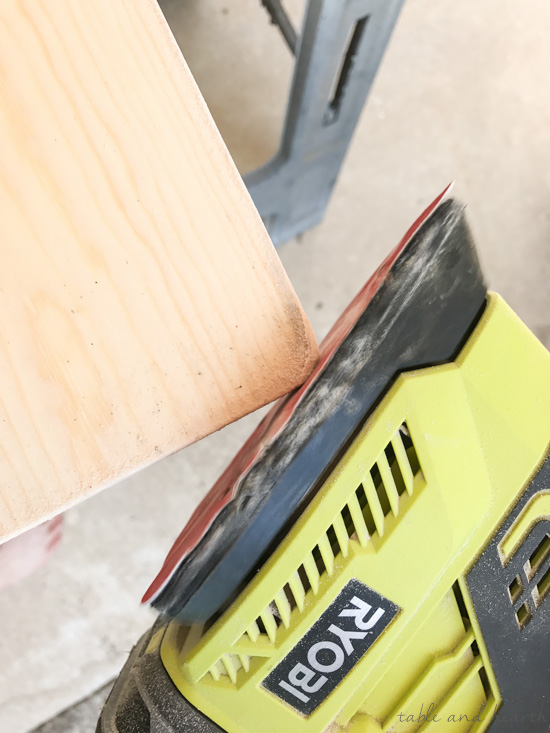
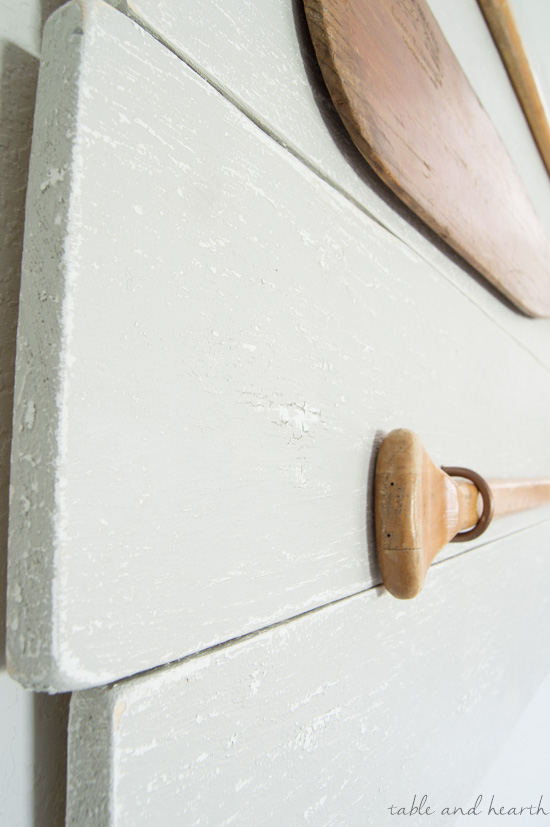
Start off by cleaning up your boards with the palm sander. I wanted my boards to have a worn-down weathered look so I really sanded down the edges and gave them divits here and there so there would be gaps between them.
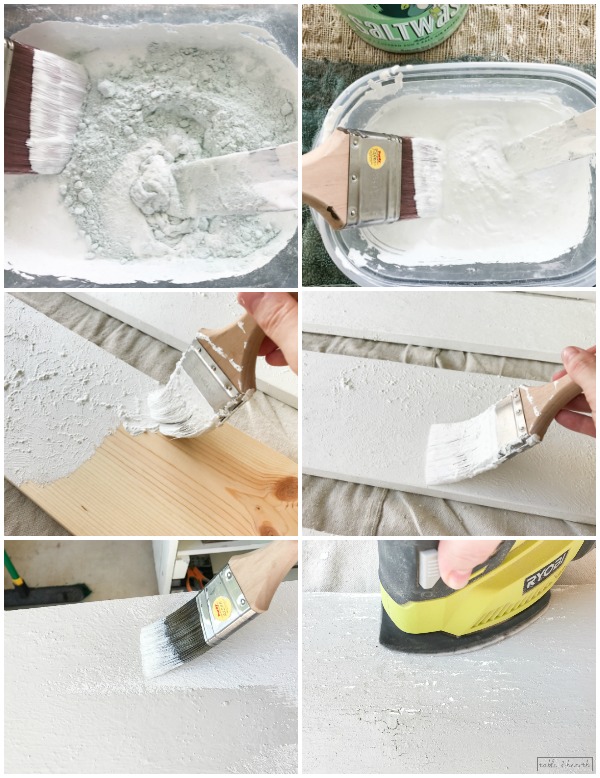
Since I wanted the boards to have such a beachy weathered look, I finally busted out my can of Saltwash. I mixed it up with some leftover white paint then applied the same light gray we used in the kitchen as the topcoat. You can achieve some pretty beautiful and colorful finishes with this stuff but I wanted my board to blend in to our space so I kept it neutral. You can find full tutorials on how to apply Saltwash HERE, but in general you mix it with paint until it’s an icing consistency, dab it on your material so it has peaks and lumps, smooth it a little when it’s dried some, paint a normal coat of paint over it, then sand and distress to reveal the various coats. I LOVE the finish and definitely want to play around with this more!
*one thing I did notice was that the Saltwash layer uses quite a bit of paint so make sure you have enough, and mix it as you go… mine got thicker while it sat waiting in between nap times :)
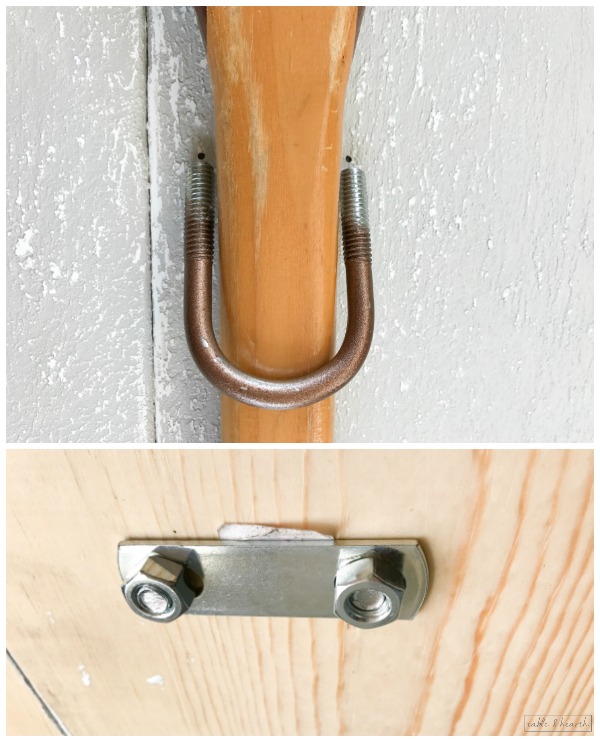
I wanted the U-bolts to blend in more so I gave them a quick spray with some metallic spray paint I had. Not totally in love with the copper-y color I used but that’s all I had, I’ll probably take them off and do a darker oil-rubbed bronze on them someday. I busted out my little tabletop spray shelter finally and it was perfect for this quick little job.

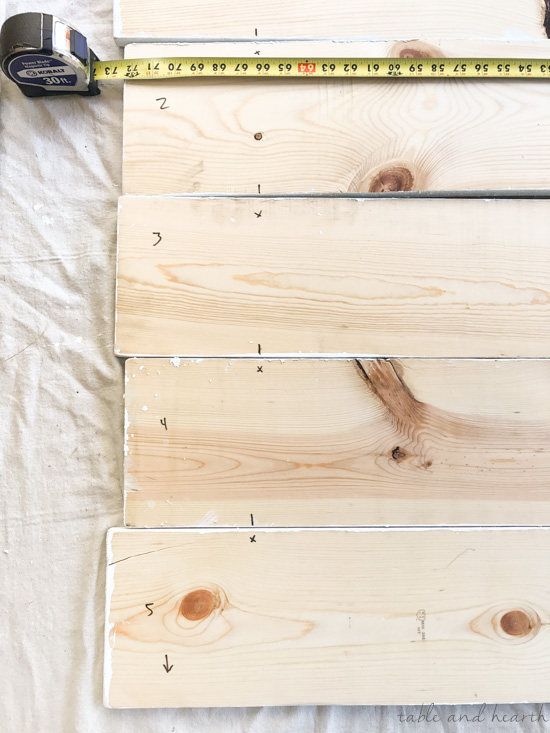
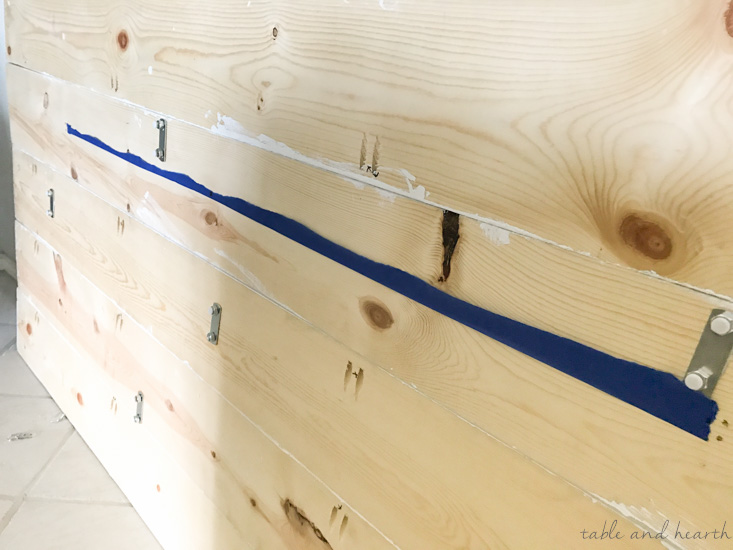
Once my boards were finished, I laid them out and staggered them a little instead of having the ends be flush so they had a more rustic look. Then I measured and marked where my pocket holes would go to join the boards. I put them six inches in from the ends and then two more evenly spaced between those. You can also stagger the pocket holes, I actually think that may make it stronger, but either way works.
Then it was time to whip out the R3 and make my pocket holes! This kit includes the pocket hole jig, adjustable drill bit for holes, the square-head bit for driving the Kreg screws, an allen wrench for adjusting the drill bit collar, and instruction booklet with cheat sheet size charts…all in a handy little carrying box. I also HIGHLY suggest using the Kreg clamps along with your jig to keep it nice and tight on your board while drilling. The circle part of the clamp clicks right into the circle pad on the jig.
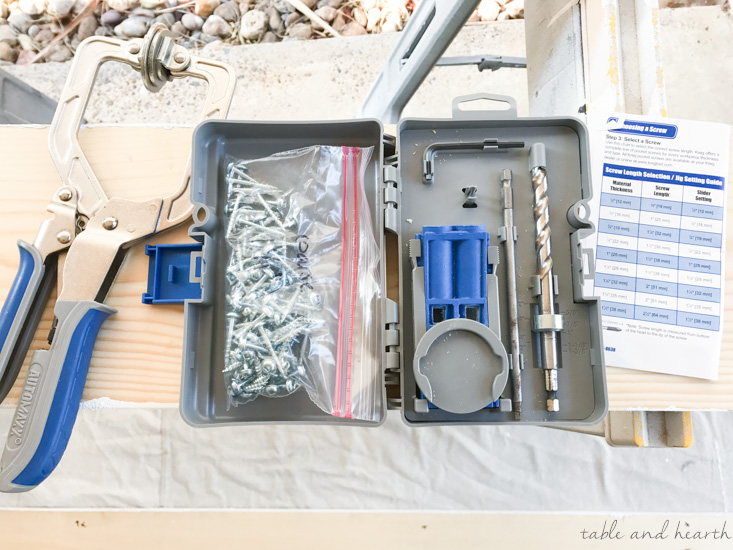
The settings, type of screw, and size of screw you use all depend on your material. Use the chart in the directions to find out what everything needs to be set at based on the measured thickness of your board (*not the labeled size as those are always higher, use the actual thickness!). Double check all your settings so you make sure your screws don’t break through your boards when you put it all together.
You’ll adjust the collar on the drill bit using the allen wrench, adjust the sliders on the jig, and select the right length and type of screw. Kreg has their own special screws with the square head. Once everything is set, you clamp your jig onto your board and drill your two holes. Once your holes are drilled, line up your two boards and drive your screws in. That’s it!

I turned my board over and marked where the U-bolts needed to go to hold my oars on, drilled holes slightly larger than the bolt so it’d slip right in, then secured them on the backside with their washer and nuts.
To hang this beast I found two studs the screws could go into but if needed you can use heavy-duty anchors as well) then installed two D-rings on the back of the board using painter’s tape to mark the locations easily. I also put little felt stickies on the ends of the bolts just to be sure they don’t mark the wall up in case they touch it when it’s hanging.
This quick update is exactly what this wall needed to make our oars stand out even more, give this wall a little more texture, as well as hold the oars safely up now!

Using pocket holes makes it so easy to attach a bunch of boards together without having to attach them to another board as a bracket or anything. This is the same technique you’d use to make a tabletop, just like I did for our outdoor dining table.
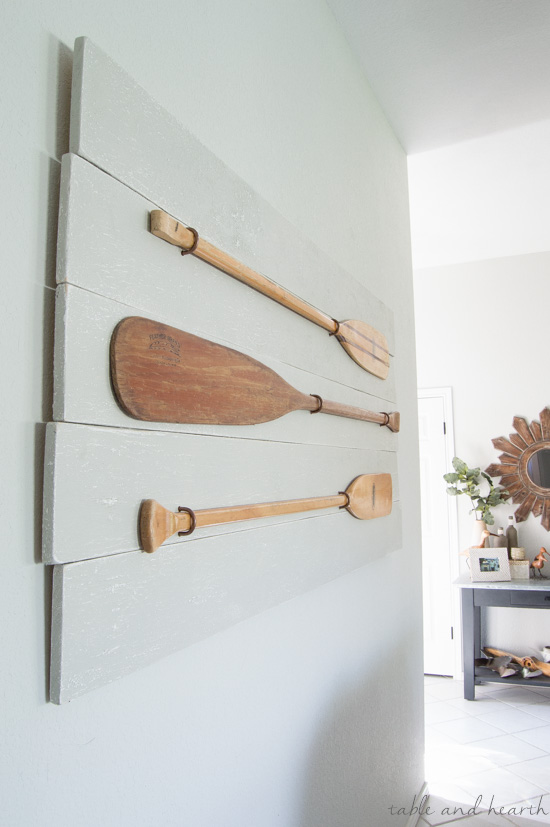


And seriously, I can’t get enough of all this beachy rustic texture! It goes along with the oars and the rest of our casual coastal decor so well.

Plus, if needed, I can always add to this board to accommodate more vintage oars if I find any…I think five would look pretty great :)

So are you sold on attempting pocket holes now?
Have you used a Kreg jig before and love it as much as I do?
They are so versatile and can be used for all sorts of building projects, small to large and beginner to advanced!
Kreg also has a TON of other super useful tools and gadgets, check out their new Accu-Cut and Rip-Cut saw guides to make the cuts for your project perfect, quick, and easy each time. This is something I struggle with way too often so I can’t wait to give these a try!
Click the images below to see what the other girls made with their jigs:

PLUS, enter below to to be one of TEN lucky readers to get their own Kreg R3 kit!


drill

sander

Kreg jig

Kreg clamp

U-bolt

metallic spraypaint

spray shelter

1×6″ board

tape measure

anchors

D-ring

Saltwash

3″ brush

paint


DIY Farmhouse Table from Reclaimed Lumber

Hanging Leather and Driftwood Sign

Driftwood Beach Towel Holder


Share this!
Oh my goodness! It’s SO pretty Emily and so perfectly you! SUCH a creative idea!
Thank you Kristi!! <3
Wow, I’ve been wanting to make something similar with my oars!!
You have inspired me ?
Awesome Cornelia!! I feel MUCH better knowing they are securely up there now, ha!
I love how this turned out, Emily!! That saltwash paint is SO neat, it’s the perfect touch!!
Thanks Amanda! The Saltwash was super fun to play with and it gives such a unique finish, it was perfect for this!
I love everything about this, Emily! It couldn’t have turned out any better.
Thank you Amy!!
Such a cool piece of art you created! It fits perfectly in your home!
Thanks so much Bre!
Love this! Definitely a good idea to mount those oars so they don’t fall on little CP! Looks great, too!
I know right?! Or me for the 29384th time!
Such a cool creative project.
Thank you! LOVE this project… and it will be perfect for the old fly rods I have collecting dust in the shop :)
Oh those would look awesome displayed like this!!