Many people hoard furniture, kitchen gadgets, collectibles, cats, all kinds of stuff. Me? I hoard shells and crap I find on the beach. So at this very moment in our garage, there’s an entire bag of driftwood, an entire bag of barnacles, a bag each of turkey wings, scallops, and cockle shells, an entire bucket of seabeans, and a bag of oyster shells and a frustrated husband. All aside from my normal shell collection of course. They’re all just so beautiful and perfect for crafts! It’s not even the marine biologist in me, it’s the crafter in me!
A few years ago, my fellow crafty friend Jenny and I were perusing one of the higher end home decor shops in Port Aransas and saw some huge, beautiful oystershell candleholders, which they were asking upwards of $100 for. We looked at each other and said “we can make that!”. We started amassing oystershells from beaches when we could and a few months later, went to the annual Oysterfest with friends as we do almost every year. Sometime between huge beers and many plates of raw oysters, it dawned on us that we were at the oystershell motherload and we needed to do something. So we were the two weirdo blondes carrying wet, disintegrating boxes of discarded, dirty, slimy oyster shells to our cars. So gross, even for us biologists. I wish we had a picture of us in action that day….sorry guys, we’re taken.
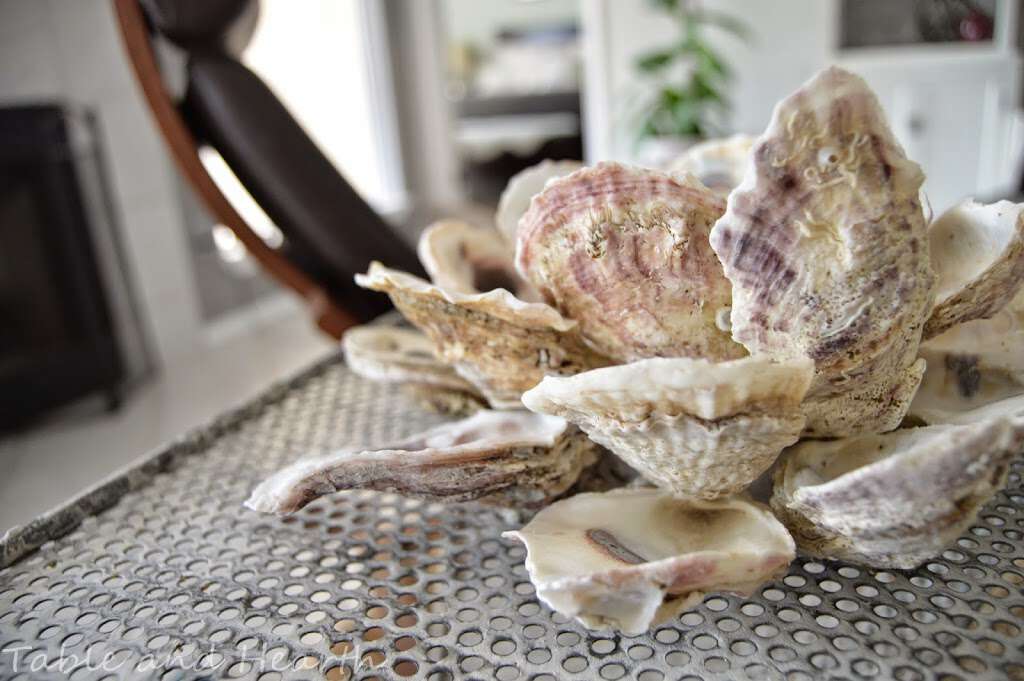
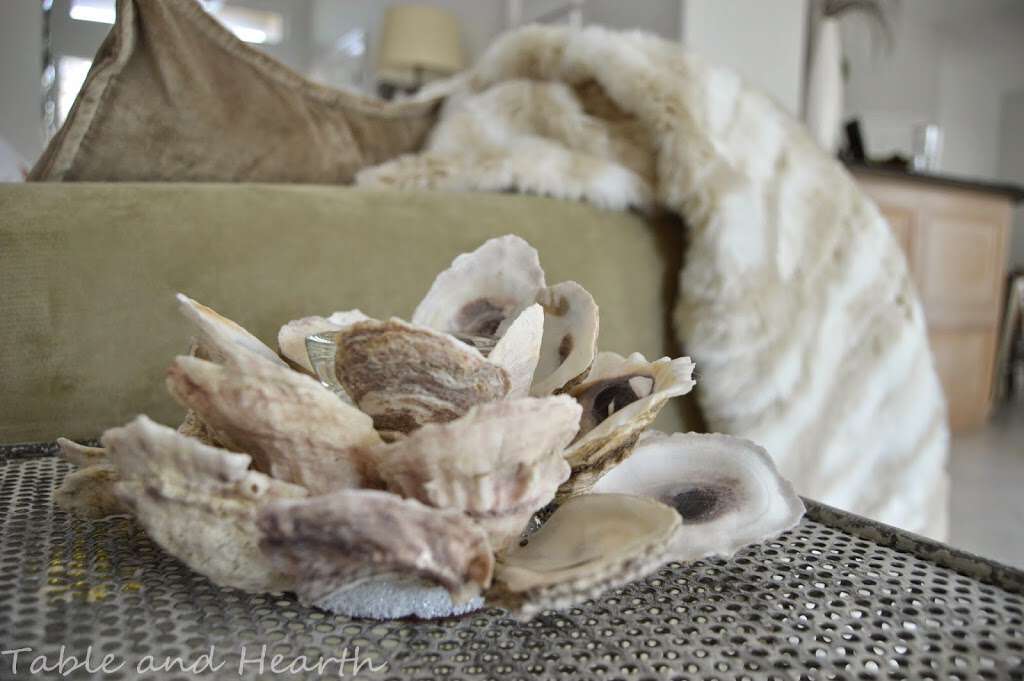
It was all totally worth it though cause for years now we’ve been making pretty spot-on replicas of the fancy store candleholders (Jenny even made this amazeballs chandelier out of them too). I still have shells left from that day so I whipped up another one to share with you guys!
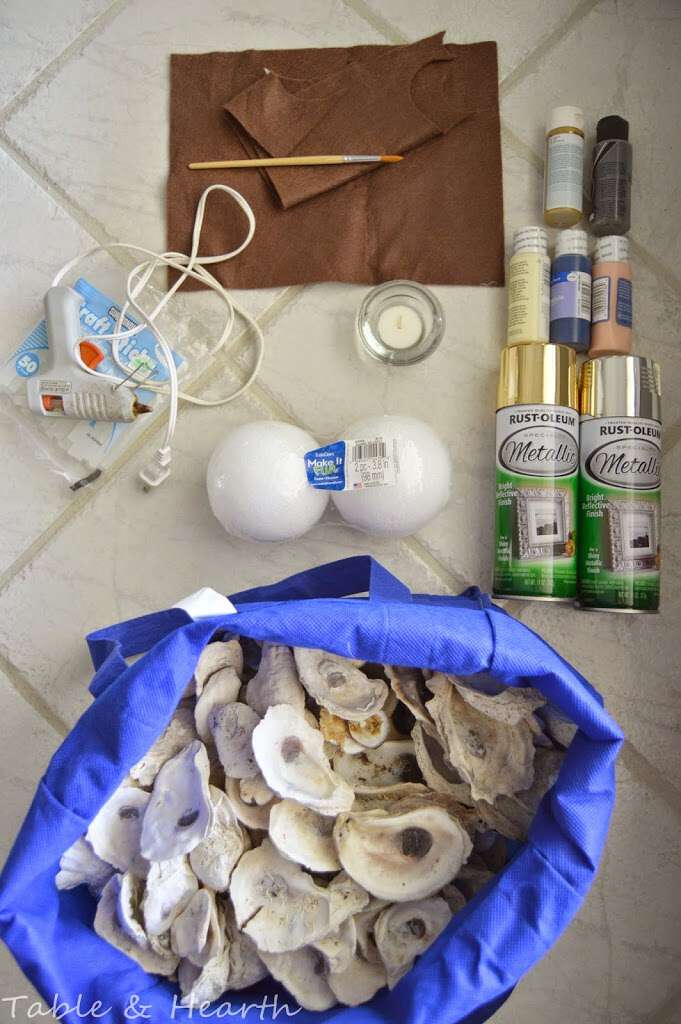
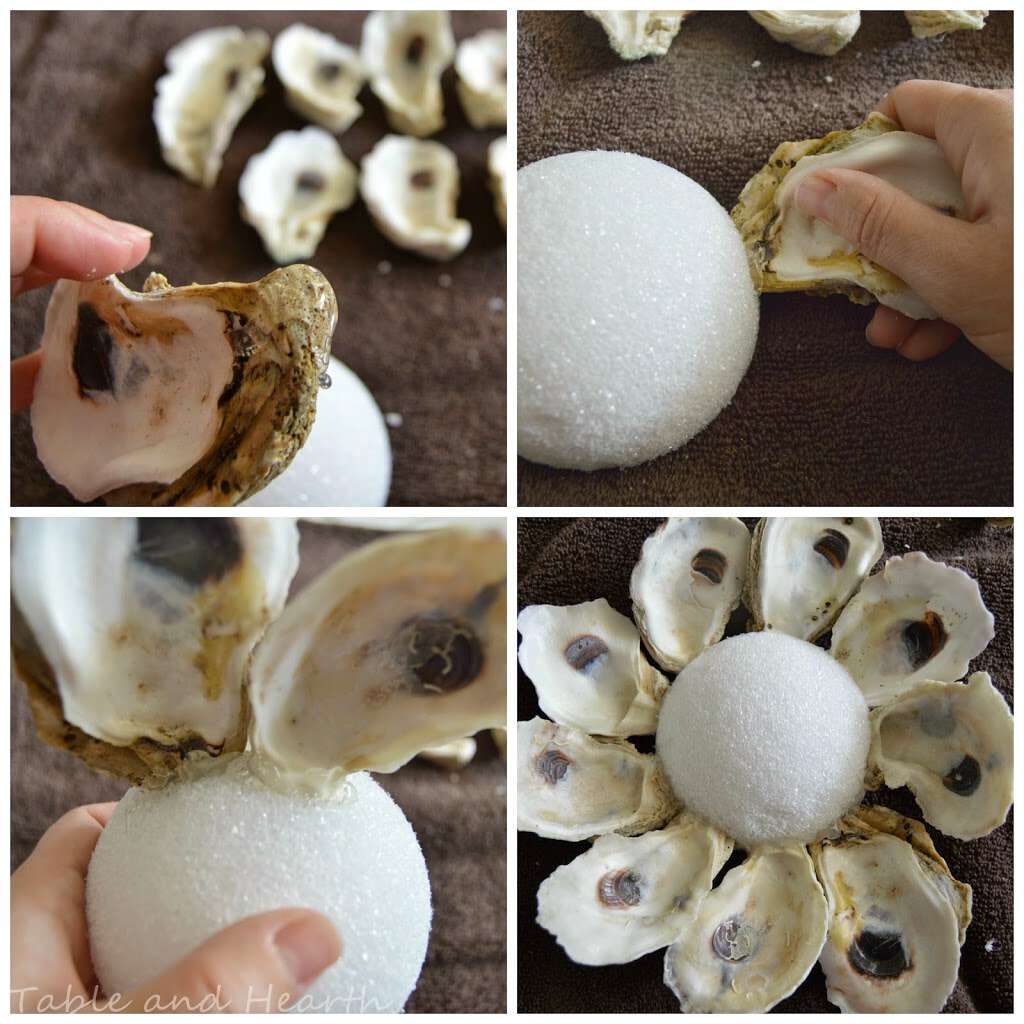
Supplies for DIY Oystershell Candleholder
- bivalve shells (any species with two shells: oysters, scallops, etc.) – I encourage collecting your own or hitting up a local seafood place for them rather than buying online
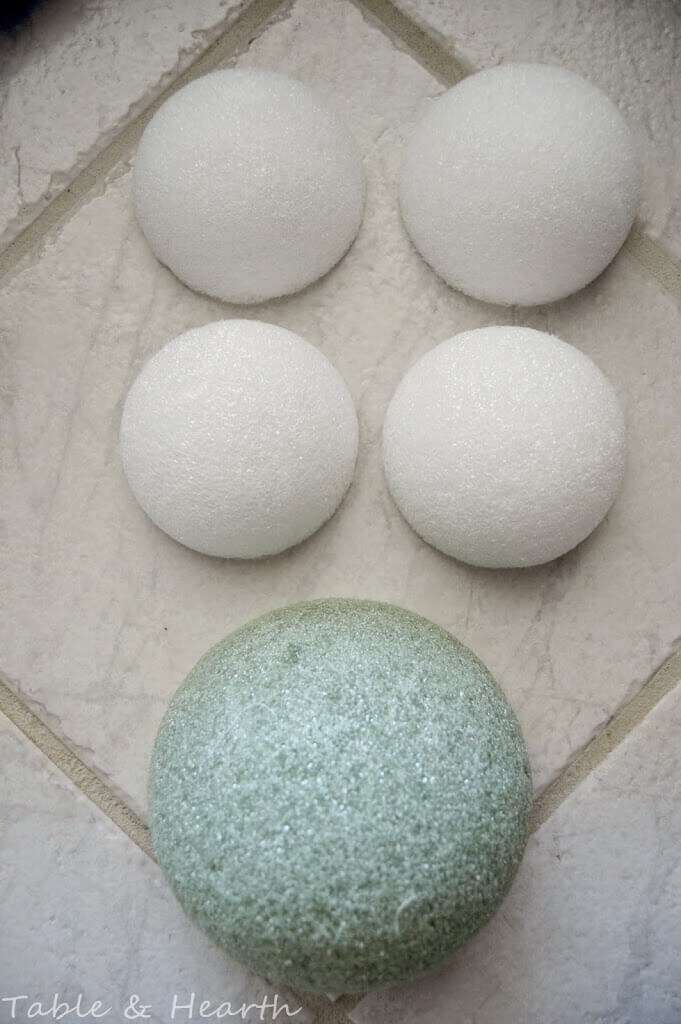
- styrofoam balls
- hot glue gun….lots and lots of hot glue
- spraypaint (optional)
- felt
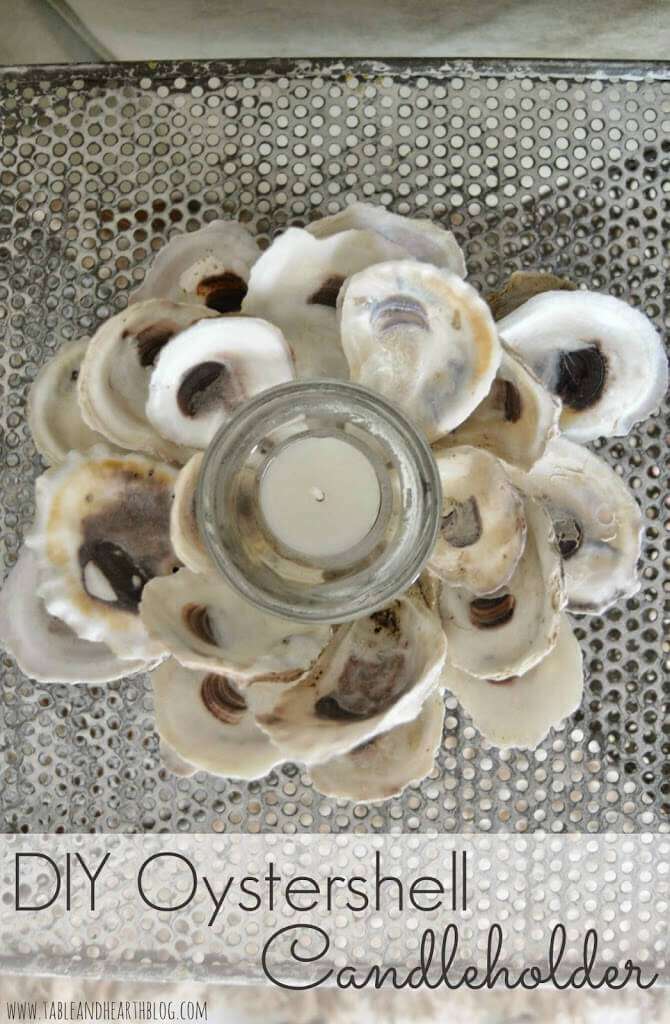
- glass votive holder
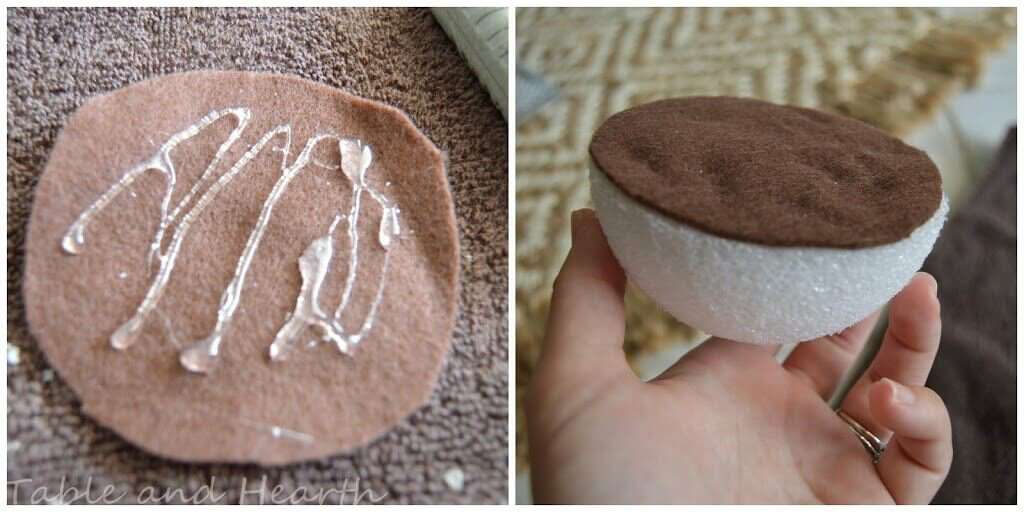

You can line the top with felt too if you want (like the scallop one below), but I just left this one bare since you can’t really tell once the votive is on it.
To hide the styrofoam better, put the shells in at a slight downwards angle and try to overlap them. Some styrofoam can still be seen if someone you look at it closely, just put it down low and give mean looks to your friends that say anything :) You can always put a piece of rope or something around the bottom where it shows the most, I was lazy and didn’t since this one will be on a low end table.

They are pretty fragile so move them around carefully and don’t pick them up by the shells. If one gets loose or pops out, you should be able to hot glue or super glue him back in though.
The next one I want to do is out of the huge cockle shells. It’ll be a biiiig one!!


Beach Collection Shadowbox

Shell Wall Hanging

Seashell Bird Feeder


I love this idea! I think the barnacle one is my favourite though :-) I have started to collect a few shells every time we visit the beach but haven’t found any ‘big’ ones yet…I am definitely going to have a better search next time!
Thanks! My friend made a HUGE barnacle one that is gorgeous, I’ll have to get a picture next time I visit her. And yes, just start grabbing as many as you can :)
These are so cool and unique! I love how they turned out. And btw, I am so totally envious of your giant garage stash of crap you found on the beach! -Amy
I’m glad that someone other than me is Amy! :)
You are so kind to give specific instructions on how to make the candleholders. Cannot wait to try! ! Gotta buy more glue sticks though!!!😂😎🥰
This is so pretty! What a clever and unique idea :) Totally perfect for a coastal house or room :)
Thanks Erica :) Depending on what kind of shells you use they can fit in all kinds of decor I think!
Great idea! Turned out so cute!
Thank you Julie!!
I LOVE this! We live in Savannah and I am dying to frame a mirror with oyster shells–I need a few boxes of slimy shells, too. :) Thanks for linking up at the Pretty Preppy Party!
Oh man Christy, I’ve always wanted to do that too! That may be next ;)
What a great use of extra shells! My mom always kept them in a vase, but that only holds so many. :-)
Oh, there’s a handful of those too Catherine :)
Amazing and so unique! I love all the different possibilities for this project! I have some shells that I’ve never known what to do with….this may be the perfect way to use them!
Go for it Jamie! And send me pictures!
I love this!! I almost bought a sphere made out of oyster shells at Homegoods over the summer- put it back and have regretted it ever since. And I totally don’t blame you for hoarding beach finds. I currently have a stash of dead garden refuse on my craft table that would qualify me for reality tv for sure. Thanks so much for linking this up to the Found & Foraged party!! I hope you’ll come again. :)
Aw man, I wish I could give you some oyster shells to make that sphere! And so glad I’m not alone in hoarding miscellaneous biota for future crafting :) Better to be on reality TV for that than for moldy food and trash IMO!
Beautiful! And as someone who has also lugged a box of slimy oyster shells home with her, I don’t think you’re in the least bit strange! :) Pinned to the Pretty Preppy Party board (and thanks for linking up!).
Yay! I’m not alone!!! Thanks :)
Stopping by after seeing this on Hometalk to get a better look. These are all so lovely. I can’t wait to give this a try. Thanks for the inspiration!
Hi Beverly! Thanks for stopping by! I hope you love them as much as we do, we’ve made a few dozen of them :)
i’m with you when it comes to shell hunting. i don’t what it is but it’s hard NOT to clleoct them, no matter how many i already have!i also use them in my decor. they are usually piled into containers like aqua canning jars, piled around pillar candles on a tray, or scattered about on the mantel or guest bedroom. i love the ocean & beach so this is also my way of bringing it home with me.on our last beach vacation in april i actually clleocted some oyster shells, so now i will have to try this unique idea of yours. love the way it turned out.judi
Hi Judi! Oh man, I just cannot leave them, cannot! I just know I’ll need them for a brilliant craft idea I’ll get someday in the middle of the night ;)
Hi. Did I miss something….why is paint needed? If you did paint one, it would be nice to see that version!
The paint is optional. I listed it in case someone wanted to spraypaint it all one color, like gold, once it is done. No, I have not painted one of mine.