Happy New Year friends!
We had a good holiday break at home but all three of us ended up sick for most of it and are still coughing weeks later, so it wasn’t the most relaxing or productive couple of weeks. And of course just a couple weeks into 2019 and the hustle is strong already, both at the day job and side job ends so I already need another break. There’s some really fun things on the horizon though that I can’t wait to share with you though, so stay tuned!
Back in December I shared all about the first market I did for my art shop, Green Sea Designs, but I didn’t get a chance to share the tutorial for that DIY shiplap backdrop before the break, so here it is now!

*find all the sources for the booth decor at this post
A big white shiplap backdrop was the first thing I envisioned when I started thinking up my booth design. My feel for the “shop” is clean, beachy, neutrals centering around weathered textures, driftwood shades, greenery, and crisp whites, and a big white wall with my beloved shiplap would be the perfect way to let the art and decor shine. Plus, any excuse to make a shiplap wall around here…
We just have my SUV and my husband’s truck to use when I do a market so the backdrop needed to be as transport-friendly as possible. I needed it to break down as easily and as flat as possible to fit into the bed of our truck along with the display rack I was bringing too. I needed to figure out A) a way to make the wall in two separate pieces, and B) a footing system that took up little room in transport. My solution was to have the wall panels slip together via wooden dowels and then the wall itself have legs that slipped into four-armed stands.
DIY Shiplap Backdrop Supplies
 *affiliate links included for your convenience, click here to see my full disclosure policy
I knew this event was in a large covered area so I made my backdrop 8′ tall but it can be made to whatever dimensions work best for you.
- (2) 4′ x 8′ x 3/4″ plywood sheets – I didn’t want my wall 8′ wide so I had mine ripped down to 6′ wide, but choose whatever width you prefer
- (2) 4′ x 8′ x 3/4″ plywood underlayment – ripped into planks (this is the same kind I’ve used in all my shiplap projects). I had my sheets cut to 6′ wide first then ripped into 6″ planks
- (2) 2″ x 2″ x 8′ posts
- 1″ x 4′ round wooden dowel – cut in half
- (8) 2′ x 4″ x 1/2″ hobby boards – cut to 18″
- miter saw
- drill
- nail gun
- RapidFuse glue – or any other quick-set super glue
- wood glue
- 1″ woodboring drill bit
- wood filler
- tape measure
- paint and supplies
DIY Shiplap Backdrop Instructions
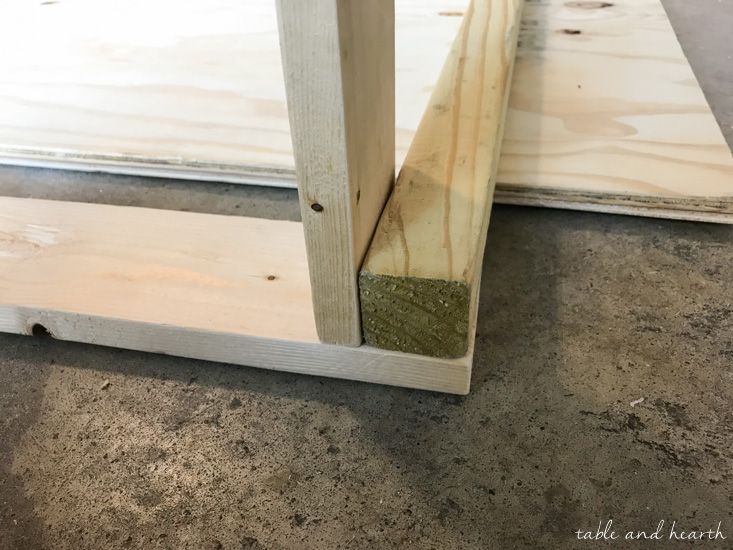
For the footing I decided to make four-armed stands (similar to these), but make it where the wall could slip in and out of them instead of being nailed on. That way they could be transported vertically or stacked and not take up a ton of room like they would if they were attached.
For the wall I went through various ideas in my head involving latches, braces, brackets, etc. but they all were too involved or would take tools at the show to set it up or something. I needed something super simple but still super sturdy. I ended up with the idea of one piece sliding onto posts on the bottom piece, so my method became holding the wall together by wooden dowels located in posts the back. There may be a technical term for this sort of mount, I have no idea, it’s just the simplest thing I could think of.
With that, let’s get started…
Wall Stands
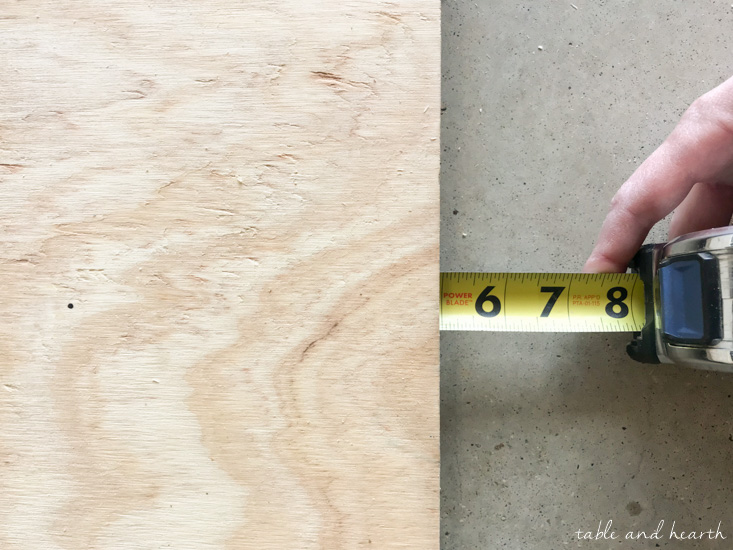
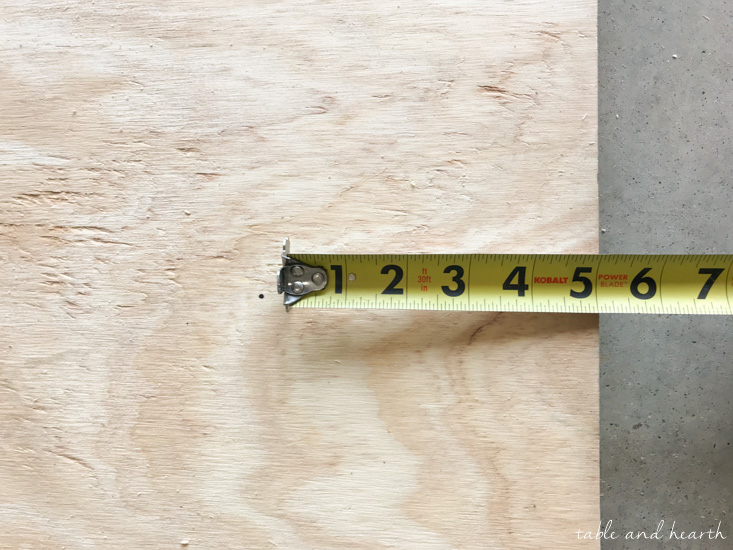
Before making the stands, you will need to modify one of your plywood panels to be shorter than 4′ so that some of the 2×2 support posts is exposed to slip into the stands. Lay (don’t attach) your shiplap planks out on the panel evenly then mark a cut even with a plank that would leave about 6-8″ exposed (that way you don’t have to rip any of your shiplap planks down too). Rip the panel along the cut with a jigsaw or table saw.
Since these stands will be removable, they aren’t attached to the wall legs with any screws or nails. Use the RapidFuse to temporarily assemble three pieces of the stand. Leave a little space around the leg rather than have them flush so that it can slide in easily. Once the set of three pieces are dry, lay the stand on the ground and attach the fourth piece, then secure them with two nails in each end with the nail gun. (no pics of this step as it was late at night, I apologize).
Fill your nail holes and you’re ready to paint!

Wall Panels
Before assembling the wall, cut the 2×2″ post in half to match the 4′ height of the plywood (the bottom half of the wall gets cut down a little later to allow for the feet).

After the posts are cut, drill as deep and as straight of a hole as you can with the 1″ woodboring bit into the four ends where the wall halves will connect in the middle. You want the holes to be as deep as possible for stability. This took quite a bit of elbow grease and patience, and kind of killed my wrists, but be careful and go slow and you’ll get the hang of it. You want them to be at least 4-5″ deep. If you happen to have a drill press or some other type of set up it maybe would go smoother.
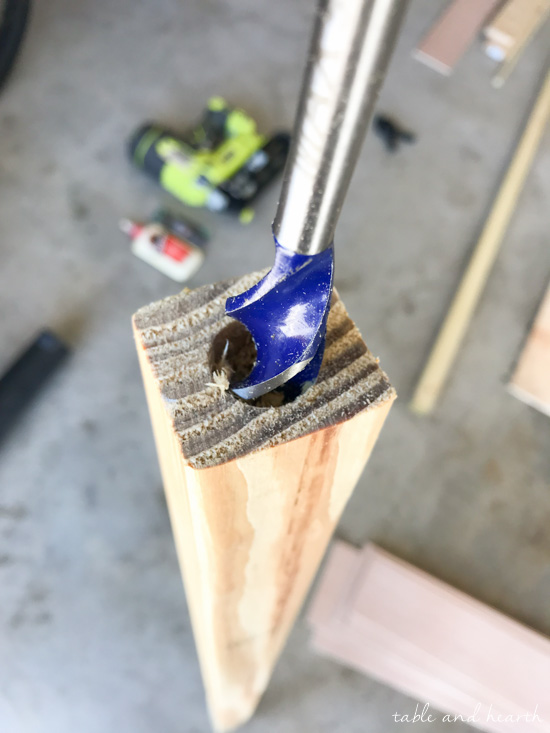
After your holes are done, use the dowel to estimate the depth of your holes on each side, add that up, then cut the dowel to that size. You want the dowel to fill as much of the hole space as possible to be more secure. If they differ in size quite a bit be sure to mark which dowel goes in what side for later.
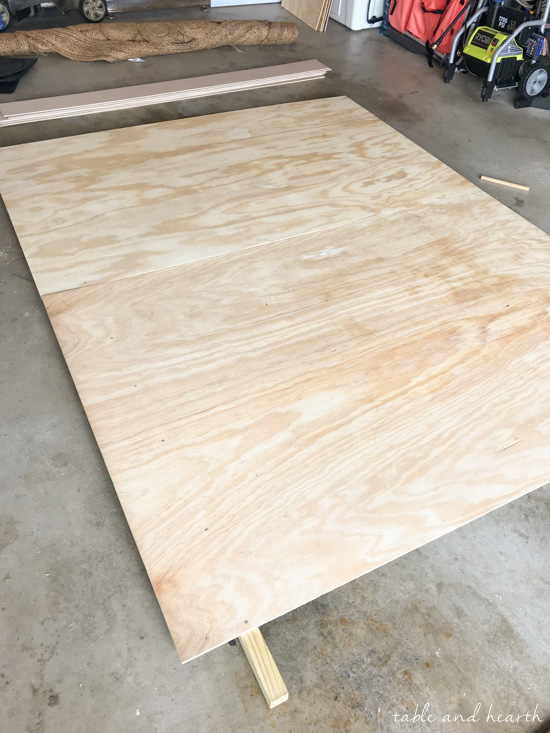
Once your 2x2s are ready, you can attach the plywood to them. Lay the 2x2s down then put the plywood on top of them, making sure they are flush in the middle so that there will be as little of a gap as possible when assembled. Set where you would like your 2×2 to be (I chose roughly 5″ from the edges, screws at 5.5″), then measure all the way down the sides until the 2x2s are even then screw the boards down.

At this point you can insert the dowels and do a test run of how your wall panels will fit together. Once they are up they should sit almost flush together.

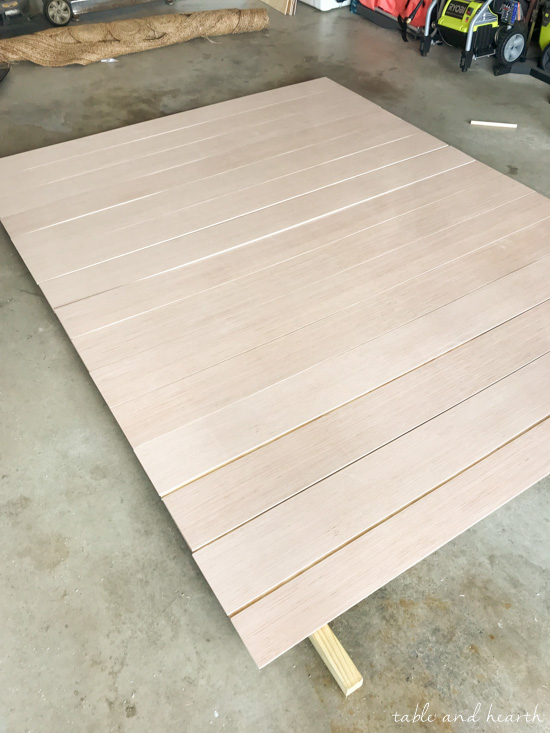
Now it’s time to shiplap, yay!! First lay all your planks out with the spacing you like and that makes it so you end on a whole plank at the end of the panel. As long as your plank widths fit into 48″ evenly you’ll be good. Mine were 6″ and I fit 8 planks on the top full panel and 7 planks on the bottom trimmed panel.
Apply some wood glue to the panel, then put your plank on. Put two nails in each side of the plank lining up with the 2×2 posts in the back. *note – since the holes you drilled will be in the middle ends of the 2x2s, you just want to put one nail in those two planks, and put it on the side away from the edge of the panel. It sounds confusing, I know, but if you put two nails there, the one closest to the edge will be going through your hole and you can’t put the dowel in…so keep the nails in those planks as far from your hole as you can (while still attaching it of course).


After the planks are all nailed/glued down, flip the panels over onto their fronts for a while so that they’re adhered well with the wood glue. Lay dropcloths down if needed to prevent scratching/denting.

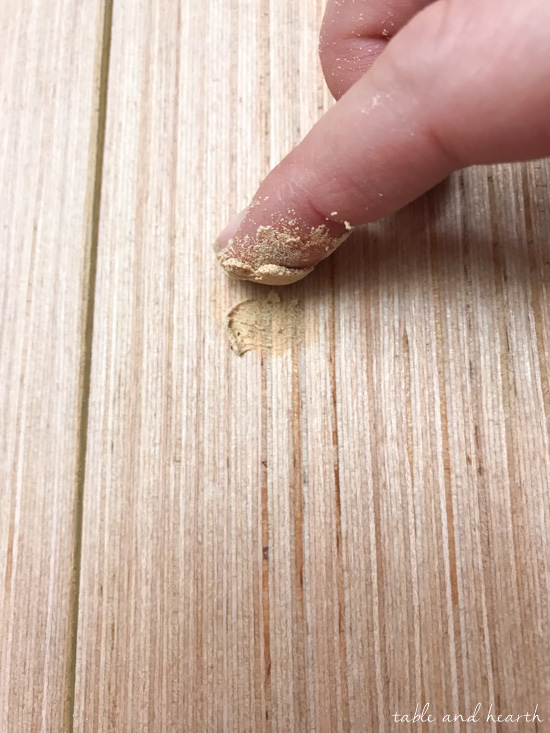
Flip your panels back over and fill all your nail holes then sand them even once they’re dry.
All that’s left then is just painting or staining all the pieces as you’d like. I used a bright white semi-gloss exterior latex hoping it would hold up to all the transport and any outdoor uses I may need it for.
(extra pieces are for the display stand I made, and excuse our messy garage lol)

I used this for my very first show ever and that day was crazy busy and stressful, so I didn’t get a picture of how we transported everything but we just laid the two wall panels in the bed of our truck, leaning on the tailgate and sandwiched with moving blankets, then tossed the stands underneath them by the tailgate. The wall is being stored at a friend’s house and takes up very little room stored vertically against the wall.
I promise to get more shots of transport and storage next time!

Here’s the wall in action at the booth!
When we set it up it was actually the first time I put it together vertically and the 8′ tall seemed soooooo high, I almost had a little freakout. But once we got the table and all my products out it ended up being the perfect statement size!

I made this design with this covered but open air market in mind so I didn’t have to worry about height or anything. If you wanted to use this with a tent setup it would just need to be modified to the right height. I plan on doing a tent booth someday so I may build a secondary top panel that’s a bit shorter to work for that. (I’ll update this post if I do) If the wall is being used out in the open where it is windy, the wall may sway a little so be prepared to stabilize it in addition to the stands if necessary with some leaning posts or tie-downs or something.

I topped my wall off with an arrangement of faux greenery from a local artist, Southern Florista, and attached it using a command hook on the back and wire. My laser cut/engraved sign was done by another local business, Milestones, and I attached it to the wall using the Command velcro strips.

I was really worried my harebrained idea about the wall breaking down into smaller pieces would be a disaster, but the wall was quite sturdy and easy to set up, break down, and transport. I also think the stature of the wall did a good job of bringing people’s eyes over to my booth and created a welcoming “room” feel to the space. This DIY shiplap backdrop would also be perfect for a photo backdrop, wedding backdrop, or any other sort of booth of course, or even to make three of them and create an entire little shiplap “room”. (#goals)
This event was a huge success so I can’t wait to do another one soon, mainly as an excuse to set a pretty white shiplap wall up again :)


1/4″ underlayment

plywood sheet

2×2 post

1″ round dowel

1/2″ x 4″ board

miter saw

nail gun

drill

sander

woodboring bit

wood glue

3″ brush

wood filler

speed square

RapidFuse

tape measure


My first market booth

Rustic White Booth Design

How to DIY Shiplap


Share this!
Can you give an estimate on the cost to make? Excited to build this!
I would say about $75, depending on if you already have the paint on hand or not. The plywood sheets are usually around $20 and the underlayment is about $15ea. Good luck!
This is a great tutorial thank you! I just finished it, but when I put it together the base came apart. I will say they weren’t perfectly flush and I could see the nails that could have been the issue. But these bases really are able to hold all the wood? I’m making this for my wife and I’m concerned a little breeze will break the base.
I didn’t have a problem with the bases supporting the wall at the events I used it at (some outdoors), but you can definitely use screws and wood glue instead of nails to help hold them together if you feel they need it. I recommend strapping any displays/walls to your tent when vending outdoors as added stability as well as weight for the tent.
oh I love This concept!! I am looking for create a Glam wall for my own business & my vendor tables. I’ll be looking at a shorter wall & in 3 pieces however I’m totally using this basic concept! I still haven’t sorted out the “glam” lol but I may go with simple & pretty. I can Always add decorations to yourself, with the command products! aren’t those fab?