I don’t know about y’all, but this long holiday weekend couldn’t have come at a better time! The last month or so has been super stressful in addition to the kitchen project which is going on four weeks now. While I’d love to knock the rest of that project out over these days off, it’ll also be so nice to just check out and take a little break from it all so that’s what I’m doing.
I’ve needed a floor-length mirror in our master bedroom for a while now, but wanted something interesting that could be a piece of decor and a focal point. Plus, we had two blank corners in our master bedroom that were just begging for some personality. Enter this beauty:

We stopped by one of my favorite little thrifty stops to grab some old windows and I took a quick little gander at her stash of old doors (duh) where I found this. I have a huge thing for old doors with chippy paint (well, anything with chippy paint really, but especially doors) so I snatched it up knowing it would be PERFECT for one of those corners and PERFECT for a full length mirror!
*affiliate links included for your convenience, click here to see my full disclosure policy
{Supplies}
- old door – either a skinny one like this or a full one could work
- jigsaw
- standard drill
- palm sander
- frameless wall mirror – in appropriate size based on door
- mirror hanging clips – in appropriate depth based on mirror
- touch up paint & brush
- tape measure
- pencil
- safety glasses
- sawhorses (if needed)
- glass knob (if needed) – I used this one, but this is another option
- spraypaint (if needed)
{How to Make A Mirror from an Old Door}
For the space I had to work with, this half-width door (old closet or bifold door maybe?) was the perfect size, but you could also use a full-sized door and just find a wider stock mirror to use with it too.

The mirror will show through the panels on the door so the first step is to carefully cut them out. I started by drilling pilot holes in the corners then running my jigsaw as close to the edge as possible. Make sure to wear your safety goggles here as some of that old paint will chip and fly off.

After they were cut, I used my sander to smooth and even out all the edges. Since there was now raw wood showing on the sides, I touched that up with some leftover SW “Westhighland White” paint which was pretty close to the door color. 
After that, I flipped the door over so I could position the mirror on the backside. My door fit a standard wall mirror perfectly so I just centered it over the two larger panels I cut out, then marked where the mirror clips needed to be located. My mirror was 1/4″ thick so I used 1/4″ clips but if your mirror happens to be thinner, make sure you get the corresponding size clips. I drilled a little pilot hole in each spot before screwing them in. I put two clips on each narrow end, then one clip on each of the long sides and it is very secure.

Unfortunately almost every time I see a beautiful vintage door for sale, it’s already had the hardware removed to be sold separately. A practice that absolutely kills me and makes me ragey. I really wanted this door to look complete and knew it would be a long and hard search to find authentic glass knobs with their backplate to fit the door, so I was happy to find this set of basic knobs with the old crystal style knob at Home Depot.

They came in either bright brass or the satin nickel so I taped off the glass and spraypainted them with my favorite metallic spraypaint to have more of a vintage feel. The mirror actually overlapped the hole (oops) so I just glued the knob into the backplate with some Gorilla glue.


So, with my trusty little model’s assistance (who is usually scared of the tripod but stuck around), here’s my new mirror!

It fits this space PERFECTLY and gives some much needed height and interest over in that corner, plus I now have a full length mirror to use when getting ready!


I still can’t believe we found such a beautiful door to fit in that space, or how easy it was to update it with the mirror! This project literally took me maybe an hour tops, and that’s always welcome around here when projects seem to always have some curveballs.
Have a safe, fun, and relaxing holiday weekend and I’ll be back next week with an update on the kitchen cabinet painting (and some sneak peeks), plus another project that I’m crazy proud of!!


drill

jigsaw

sander

tape measure

mirror clips

knob

metallic spraypaint

frameless mirror

sawhorses

paint

safety glasses

1″ brush


Driftwood Towel Organizer

DIY Farmhouse Table from Reclaimed Lumber
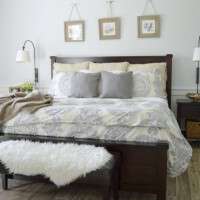
Light and Bright Master Bedroom


What a cool idea! This looks great – the whole room is beautiful.
Thank you Amanda!
I absolutely love this! So much better than a framed standing full-length mirror…
Right?! So much prettier :)