Hi everyone! Welcome to the May Home Depot Gift Challenge!
**This challenge is not sponsored in any way by Home Depot, we just love them and pretty much live there so we’d thought this would be fun…**
If you’re new around here (hi!), the HD gift challenge is where 11 other bloggers and myself challenge ourselves with using one selected item from Home Depot to make a gift for a designated recipient, all in just one month. This month, Amy from Home Remedies picked a basic 2×4 as our item and chose a new homeowner as the recipient. I absolutely loved the idea of making something for a new homeowner but man, a 2×4 was really throwing me for a loop. It’s like the more simple the item, the harder it is for me to come up with ideas!
An idea finally popped into my head and I knew exactly who I wanted it to be for. You guys may remember my sweet bestie and guest-poster Rosalie. Well, she bought the cutest little cottage in town a couple of years ago and they love to spend time outside. Plus, she’s a birder just like we are so I decided to make a cute, beachy, shabby, bird feeder for her!

There’s just a few, simple supplies needed:
– Large shells that have some sort of bowl shape. I wanted to use cockles but I couldn’t find my hoarded stash of them so I used some larger lightening whelks instead. Big oyster shells, big scallops…stuff like that would work too.
– 2×4″ in whatever length you need – Mine was from the scrap pile at HD and was about 24″
– 36″ tall wooden stakes
– paint
– wood stain – I used Minwax “dark walnut”
– polyurethane – I used Polyshades to stain the legs and regular clear poly on the top
– sander
– (4) 2+” screws
– drill and various bits
– short screws
I wanted this to look old and weathered; one because that’s Ro’s style, and two because it’ll be outside and will look that way soon enough on it’s own. Now, I’m not much of a painting/refinishing pro whatsoever and have never distressed anything in a project. I was a chalk paint virgin up until a mere six months ago and have painted two things with it, two. So it goes without saying that I’m pretty timid about attempting different looks on wood, although it’s an area I definitely want to practice more in. I’ve been wanting to try this technique from Thrifty & Chic for a while because it looks simple and pretty fail-proof, I figured this was the perfect little thing to try it on.
Oh man, I’m hooked. One coat of simple white paint, sanding, then wiping on some stain and that’s it! Just that and it gives this beautiful finish! I couldn’t believe it, was a new thing I attempted seriously so successful right of the bat?? Could it be?!? Yup.

After the top was dry, I marked on the underside where I wanted my legs to attach and drilled two holes where the screws would go (I did two screws to keep the legs from rotating around). Matt held the leg while I slowly drilled the screw through the hole into it, making sure they didn’t split or anything.

Now, for making holes in the shells. I actually have never drilled through a shell before and thought it’d be pretty basic as long as I did it gradually and slow. I marked a spot that would allow them to sit even while still being able to get a screwdriver in there, and started, but couldn’t get it to go at all. I googled how to drill through seashells just in case and got freaked out from all kinds of stuff about having to do it under water, using diamond bits, etc. I thought I’d have to throw in the towel on this idea altogether. Then Matthew grabbed a more blunt drill bit and tried, and it worked fine! Leave it to him to save the day, no crazy drilling or bits needed after all!

We were finally on a roll. I would drill through the opening with the smallest bit, then flip the shell over and continue drilling with two gradually larger bits. The hole is large enough so that there’s a little bit of room around the screw to allow water to seep out and not collect in them.
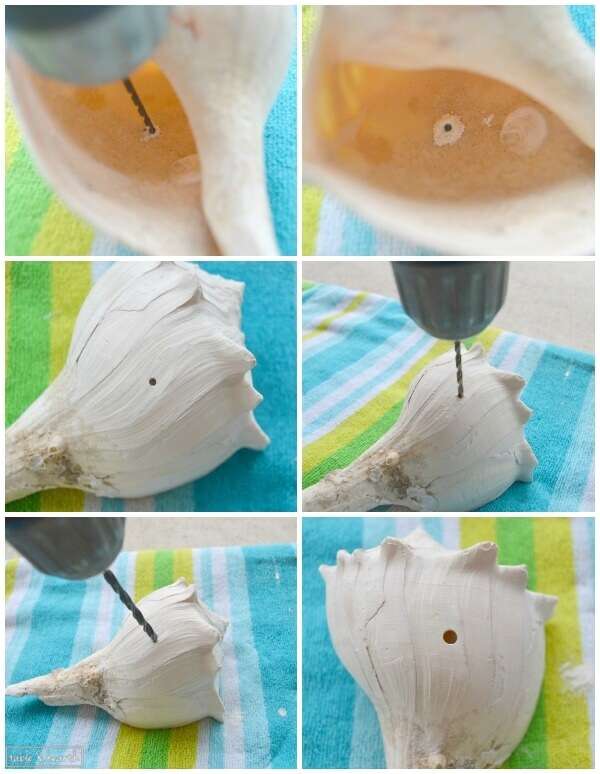

I hammered this guy into the ground at the edge of our pergola near the birdbath, putting a towel over the board and using a rubber mallet so that the surface wouldn’t get damaged. I set my shells out how I wanted them and marked through the hole where to drill, then drilled a little pilot hole for each.


I hand screwed them down with the short screws, only tight enough to keep them from wiggling or turning, taking care to be gentle so that they didn’t crack.

I filled ’em up and they’re ready to go. Like a beach bird buffet. I am thinking that the pointy ends of the shells will give them a nice little perch to hang out on.


I screwed a little hook on the underside and hung a suet cage off of it, just to give them more options you know? Alot of our birds down here go for the suet more than the seed.

The night after I took these pictures we had some super crazy storms and a TON of rain, and in the morning almost all the birdseed was still there, so it has been tested and can handle rain fine :)
I am so happy with the way this turned out, especially after it started off looking like I wouldn’t be able to do it. But that’s how it goes in DIY right? You get to a point when you think you have to throw in the towel, mumble obscenities and take it out on your husband, but you keep trying and finally get it and have something awesome in the end!

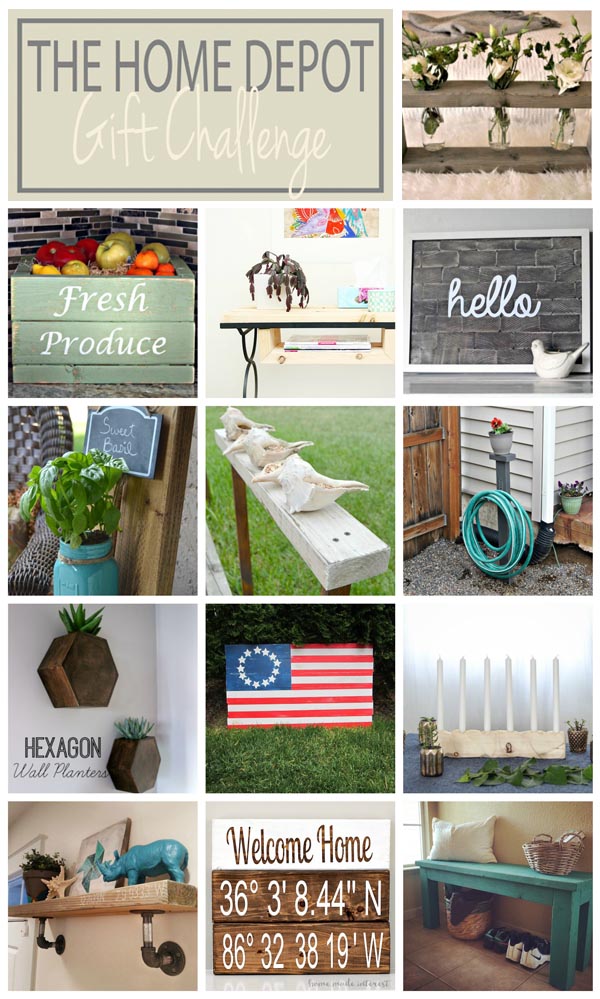
Want even more awesome? See all the other 2×4 projects from the other girls here!
You can catch all our other projects over the last few months on our Pinterest board too:
Follow Emily @ Table & Hearth’s board The Home Depot Gift Challenge on Pinterest.


I love that you used shells for the birdseed, awesome project!
Gotta do something with all those shells I hoard ;) Thanks Roxanne!!
Wow! What a great idea, Emily! This is awesome – the perfect beachy, cottagey birdfeeder! I’m sure your friend will love it!
Thank you Amy! Ready to make myself one too :)
I never in a million years would have thought to use shells as a bird feeder and I absolutely love it. Great project!
Thank you Kat ;) I think it’s a sickness, I use shells for EVERYTHING.
Brilliant! And, you’re making me reeeeally wish I lived near the ocean. ;)
My place is going to look like one of those old salty and shady shell shops run by old ladies some day!
What a cute feeder! I’m like you the simpler the item, the harder inspiration is to come by. Haha. I love you are a birder. So is my husband. It’s pretty fun getting to learn about all the pretty birds out there. :)
I hate that I never paid attention to it growing up but finally, we all got into it during grad school since some of my friends studied ornithology, then I showed Matt when we started dating. Now he’s better at it than I am! It’s hard not to be one down here, we have such amazing migrations, it’s crazy!
Wow! What an awesome idea for shells! Love it!
Thank you Emily!!
Beach bird feeder, I love it! This is totally adorable, and so clever!! I love the shell idea, those are the perfect little bird feeders!
I will definitely be making myself one of these, especially if I can ever find my stash of huge cockle shells, they’d be even better! Thanks Amanda :) BTW, I think I was commenting on your wedding post at the same time you were over here ;)
Leave it to Emily to use shells in a project! Lol. Never would have thought to do this. I’m sure that your friend will love it!
I don’t dissapoint ;) Thanks Lindi!
So creative, Emily!! It’s fabulous and I love how the weathered wood look turned out.:) Beautiful! I’m sure your friend will love it!
I just blew me away how easy that was to achieve! Now I want to do it everywhere :) Thanks Shannon!
So cute and beachy! I never would have thought to use seashells as bird feeders – I love it though!
Thank you Shelly :)
Oh you clever girl! I adore this project. Now, if it ever stops raining in Keller I will begin working in my garden. :)
Have a wonderful weekend!
Aw, thank you Laura! Man, it’s crazy, my mother lives in Lewisville and is on the verge of floating away!
What a lovely idea!
Thank you Virginia!!
Just so cute!
I would love for you to stop by my blog and join our Something to Talk About link Party!
Have a great week!
Karen
Thanks so much Karen, I’ll head over now :)
I can’t tell you how much I love this bird feeder. Such a clever idea!
Thanks so much Carmody :)
Super clever!
Thank you Jenna :)
I love this idea! I think this might just be a DIY Father’s Day gift!
That’s a super sweet idea :)
This is such a cute idea and something I never would have thought of. Great job!
Anything I can do with shells! Thanks Katie :)
This is absolutely amazing, and right up my alley! I think I know what I’m making for my porch next:-)
Eeee! Awesome Cat! I want to see it if you make one!
Love it, Emily! It fits so well with your coastal vibe. And so much prettier than typical feeders.
Thank you Sarah!! I just imagine how awesome it would be with some REALLY big shells, someday :)
Emily, this is so cute/clever! We used to have an uuuugly bird feeder from the old lady before us when we moved in. I just took it down but want the birds to keep coming (my kids love them!)
Ha! So happy to give you a new option Colleen :)
This is so cool!! I love sea shells but have never really had a great place to put them other than the bathroom! I bet those birds love it!
-Shonee
http://www.hawthorneandmain.com
Thank you Shonee, they go EVERYWHERE around here ;)
Such a clever idea! Thanks so much for linking up to the May Pretty Preppy Party! :)
Thank you Sarah! I love the PPP ;)
I love how creative this project is and it turned out so pretty! thanks for sharing at The Creative Circle.
Thanks so much Kathy!!
Oh my gosh, what a totally creative idea!!! I just love how this turned out! Pinning for sure, and I’m dropping by to let you know that this project was my pick for Rockstar of the week over at Creativity Unleashed, so thanks for linking up! Voting has just opened for MEGA Rockstar of the week and you’re in the running, so head over and vote and tell your friends to vote too! I really hope you win this week!
Eeeeee!!! So exciting Jessi, thank you! Such awesome projects to be up there with :)
Love shells and love this idea. However, how do you keep the squirrels away?
Thank you Cheryl! We actually don’t have many squirrels out on the island here where I’m at (we’ve only ever had one at our house) so I don’t have any advice, but they don’t hold very much seed so you’d probably have to refill them pretty often anyways.