It’s amazing what a good cleaning and simple stucco wall border can do to freshen up a small courtyard and add even more curb appeal! Not only did we update our entryway with a new door and new courtyard decor, but the courtyard itself and its stucco wall got a welcome makeover as well.
Our home isn’t much to look at in terms of curb appeal no thanks to it’s street-facing garage (almost standard in the region, and a design trend I despise), paved front “yard”, and large stucco wall front and center, but we’ve worked on what we can and I’m happy to say after this second phase of our little exterior makeover, it’s all looking much nicer!
 *affiliate links may be used for your convenience, click here to see my full disclosure policy
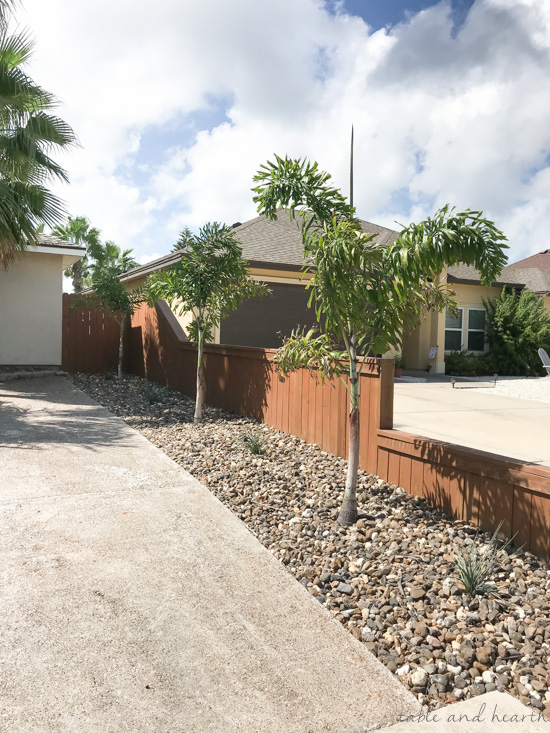
The first area we tackled was this side bed between us and the neighbor’s house. We tore out some huge oleander trees, had a fence built, and planted some pretty palm trees. You can see the scary before photos and all about that process HERE.
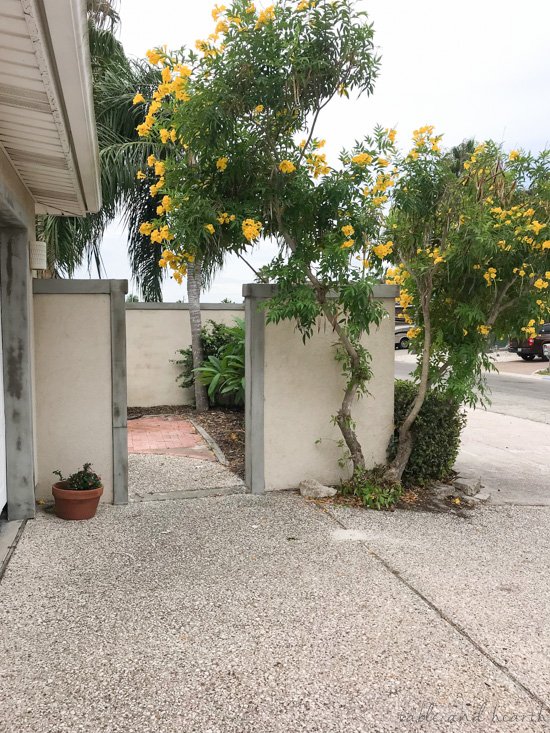
From there we turned our attention over to the courtyard and the courtyard wall. If we were going to have a fancy new door we wanted a fancy ‘new’ courtyard to go with it of course!
Adding the Stucco Wall Border
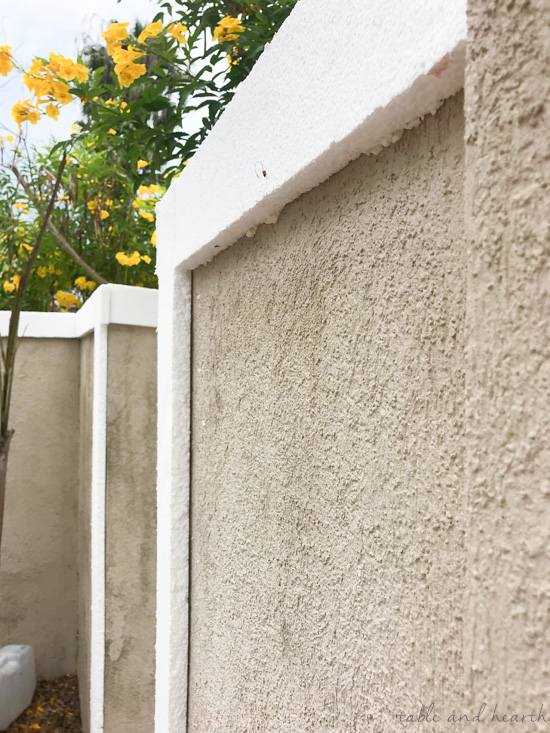
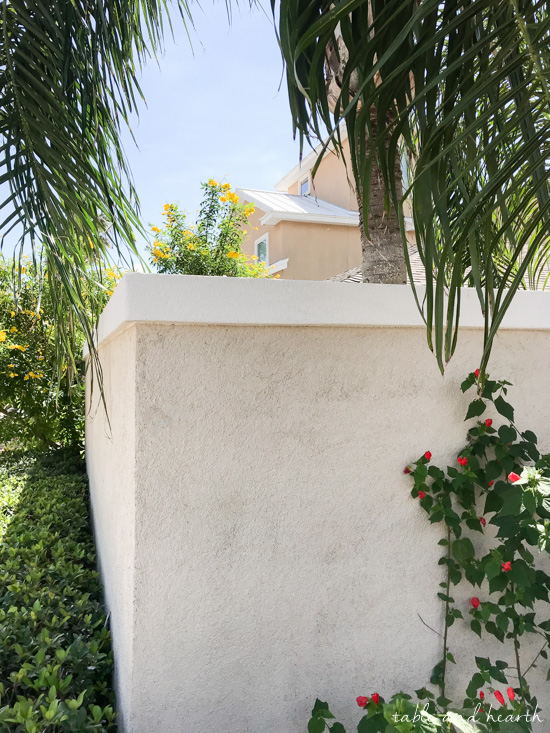
While it may seem strange to have a big stucco wall right in front of the house, it’s pretty common here on the island with many homes being stucco and many homes having a courtyard in front. While it turned me off when we first looked at the home, I actually really like it now because it adds a layer of privacy and separation from the road. I am not a fan, however, of the stark modern look of it and how it’s just a plain simple wall.
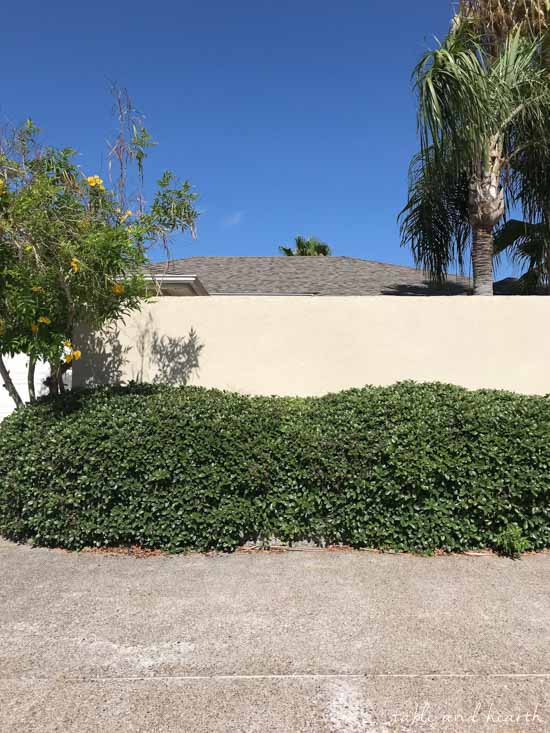
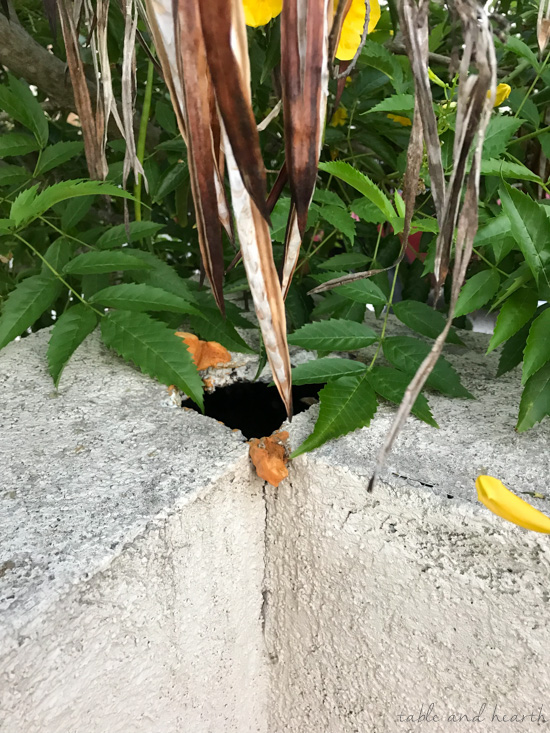
Unfortunately, the wall is just hollow with styrofoam layers that the stucco is applied to and it had started to get holes in the top, some being pretty significant. And in a super fun turn of events, twice we’ve had bees set up shop INSIDE the wall thanks to these holes. We got the bees taken care of finally and put some foam insulation over the holes, but something needed to be done.
My first plan for the wall was to have it shortened by about 18-24″ to be a little more inviting, show more of the pretty new door, and allow us to see out into the street better. I thought it couldn’t be that big of a project, considering its hollow styrofoam construction, and all they’d have to do was cut it across then put a cap back over it. Right? Wrong. As I learned with the door install, any work on stucco is EXPENSIVE. I got quotes from three local contractors on the cost to shorten the wall and the range was $2500-5000. Five.Thousand.Dollars. I mean, if we had tons of money lying around I’d do it in a heartbeat because I KNOW it would look amazing, but we for sure don’t…so I had to think of something else to do here.
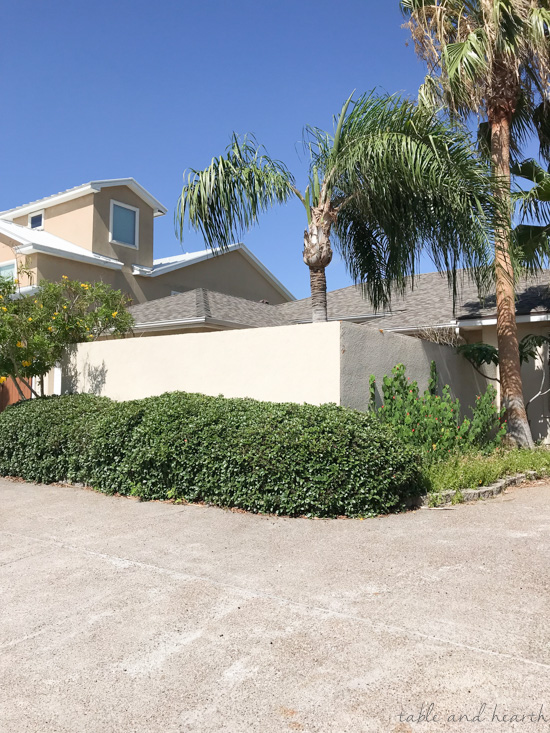
Luckily I found the perfect simple solution in our neighborhood. There are a few houses that have similar courtyard walls but I noticed they all have white trim pieces along the top and sides which would be a great, relatively simple, upgrade for ours too, and would solve the issue of holes in the top. So a stucco wall border it was.

I found a local contractor who could get started right away and I was so surprised by the process of how this is done.
I had NO IDEA they used styrofoam to create these shapes! Although I should have since I knew the stucco on our home is laid over styrofoam. Not the strongest way to build stucco I’m pretty sure, but definitely most common for our era of stucco home and common for trim work. The first day they cut and glued all the styrofoam base pieces to the wall and thoroughly patched all the holes.
Then the second day they came to put the first coat of stucco/concrete over it. At the last minute I asked them about painting the existing trim around our garage and front windows white as well, which they said they could do however, they had to treat it just like if it were new stucco so they had to put a coat of the concrete on it as well for the paint layer to adhere to.
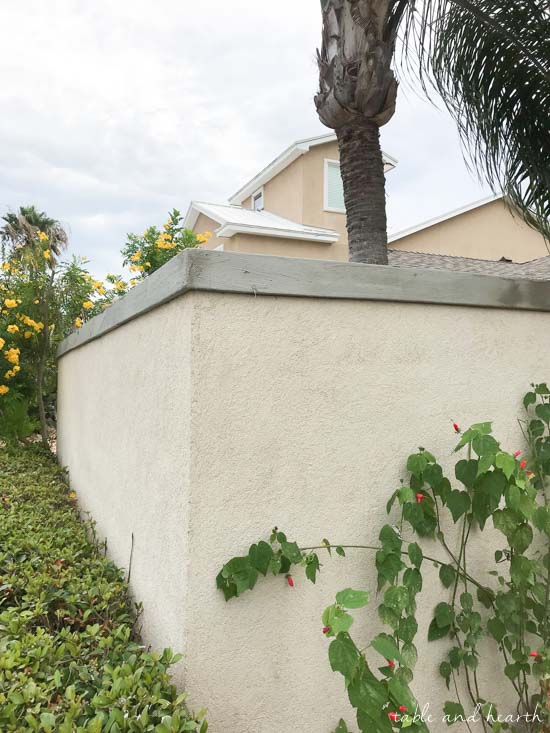
On the last day they applied the white paint layer of stucco to the wall and trim around the garage and windows and that was it for our stucco wall border. It looks so much more polished, complete, and way less modern and stark!
We also got our Indian hawthorn hedges all trimmed up which also makes the wall look much cleaner. We only flushed out one snake this time, that and 29484839 cockroaches, ewww.

Courtyard Cleanup
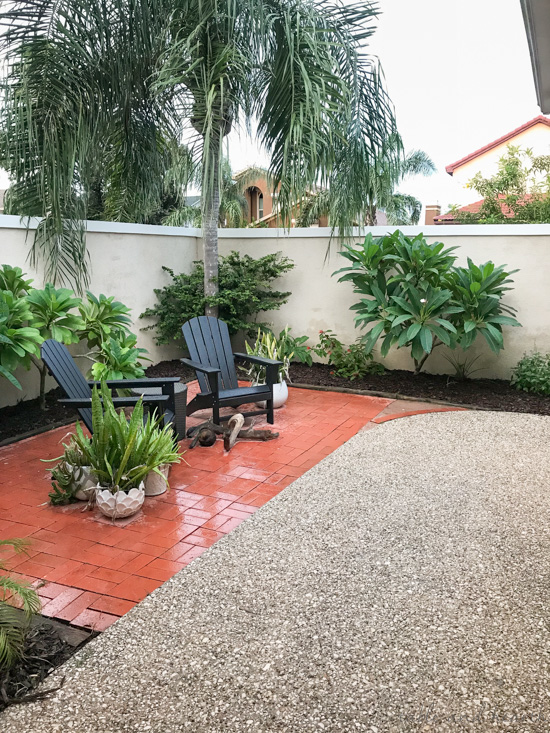
Inside the courtyard got a long overdue cleanup as well after the trim work was completed. Things get a bit unruly pretty quick in here so it was due for a cleanup, but this time I took it to the next level with a new power washer :)
Here’s how the courtyard looked when we started this whole project. Luckily the flowerbeds have stayed pretty tidy since their makeover a few years ago, but the brick pavers, concrete, and some areas of the stucco wall had grime and mold growing on them.

A power washer has long been on my list of dream tools to own and this was the perfect excuse to finally get one. I went with my favorite brand Ryobi and this is the model I chose. I would’ve loved to have the battery-powered one but the budget just didn’t allow for that, but this one works amazing!
I got everything cleared out and went to town one afternoon. There may not be a more relaxing or satisfying task than power washing something lol. I could do it all day long.


This guy made quick work of all that grime and made it look like we had brand new pavers again. You also wouldn’t believe how much crud is hidden on that pebbled concrete, it was disgusting!

After all that the courtyard was ready to be decorated just in time for the new door install to begin! We’ve got a completely transformed courtyard worthy of that beautiful new entryway as well as more welcoming curb appeal.
We are thrilled to have a wall with more curb appeal now, also beehive-less, and we’re also happy to have a nice clean courtyard to greet our guests. Stay tuned for the full reveal of the door and entryway next week, you won’t believe how beautiful it turned out!


Privacy Fence Makeover

Coastal Entryway Inspiration

Choosing the Right Entry Door for a Coastal Home

Installing a New Door Unit on a Stucco Home


Share this!